The Spine: A Critical Stabilizer of Movement

The spine, a complex structure composed of vertebrae, discs, ligaments, and muscles, plays a vital role in the stabilization of movement in the human body. This article delves into the anatomy of the spine, its functions, and how it contributes to the stability required for both everyday activities and athletic performance.

Anatomy of the Spine

The human spine consists of 33 vertebrae segmented into five regions:

  1. Cervical Spine (7 vertebrae): Located in the neck, it supports the head and allows for mobility.
  2. Thoracic Spine (12 vertebrae): Attached to the ribs, it forms the upper back and provides stability and protection to the organs.
  3. Lumbar Spine (5 vertebrae): The lower back region designed to bear weight and facilitate (stabilize) movement.
  4. Sacrum (5 fused vertebrae): Connects the spine to the pelvis and supports the weight of the upper body.
  5. Coccyx (4 fused vertebrae): Commonly known as the tailbone, it provides attachment for ligaments and muscles.
Photo by Tima Miroshnichenko on Pexels.com

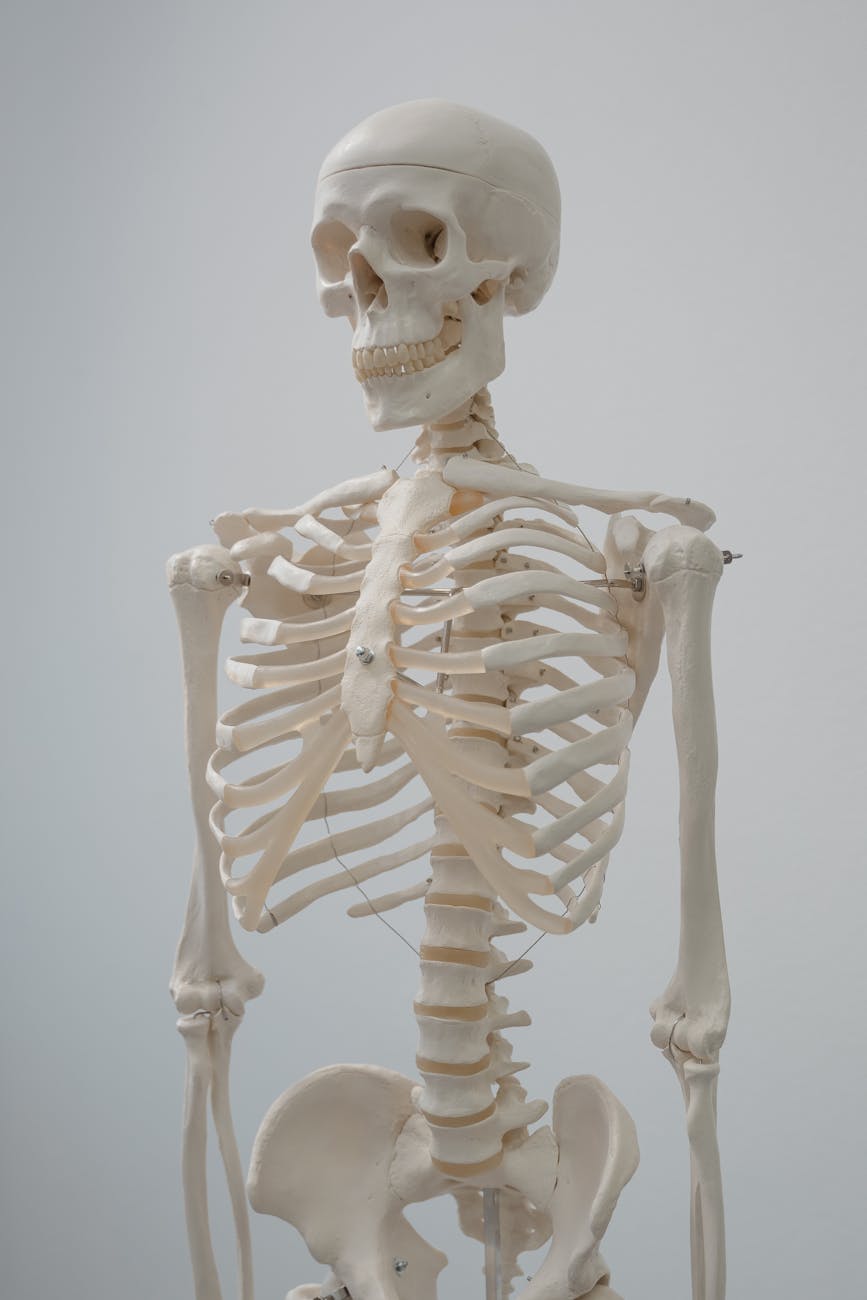
Between each vertebra are intervertebral discs, which act as shock absorbers, allowing flexibility while protecting the vertebrae from impact.

Functions of the Spine in Movement Stabilization

1. Structural Support

The spine provides the primary framework for the body’s structure. By maintaining an upright posture and aligning the body’s center of gravity, it helps to stabilize the body during movement. Strong spinal alignment reduces the risk of injuries during physical exertion.

2. Load Distribution

The discs in the spine help distribute loads evenly across the vertebrae, reducing stress on any single part. This load distribution is crucial during activities like lifting or running, where the body experiences high impacts.

3. Facilitating Movement

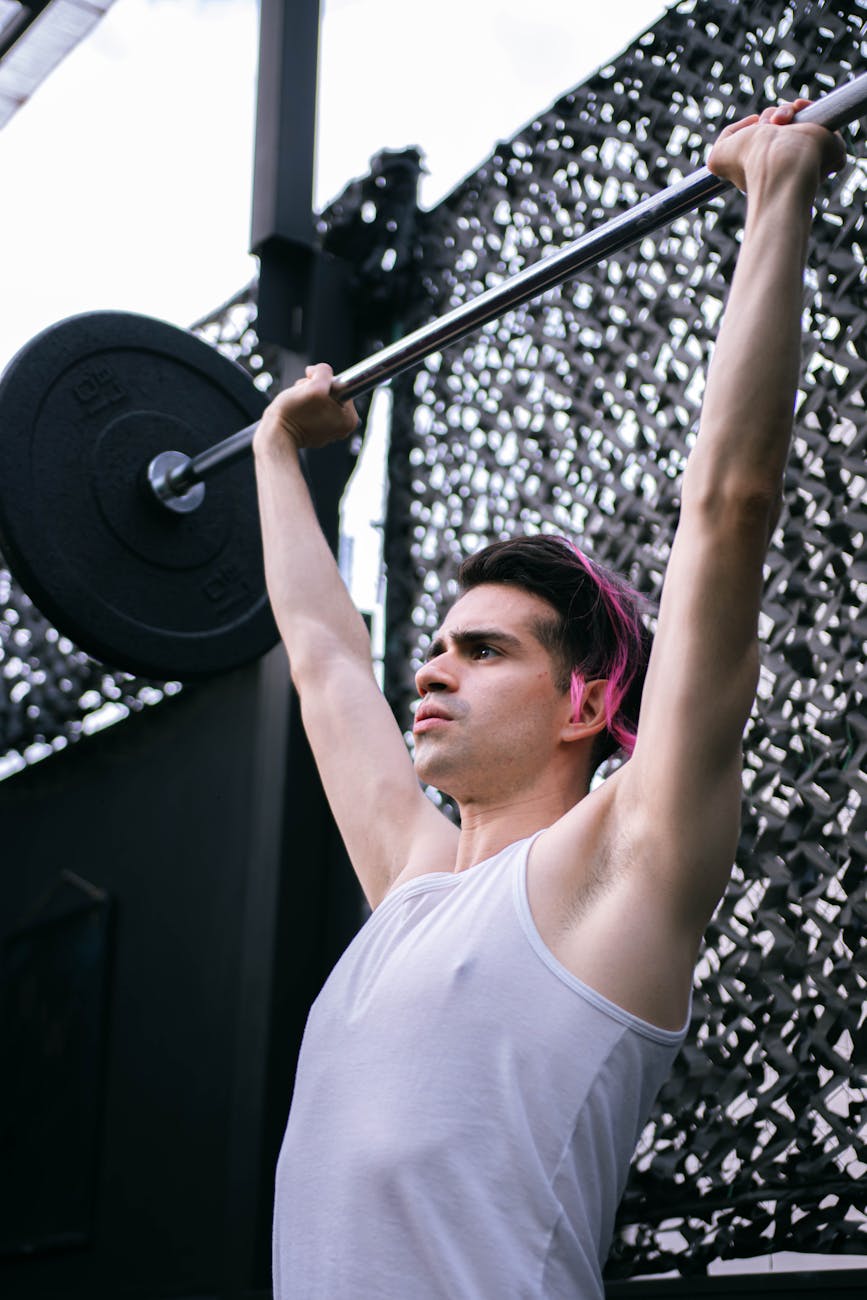
The spine allows for a range of movements including hip hinging, hip rotation, and squatting. This mobility is essential for daily activities, from basic actions like walking to more complex movements in sports. The spine’s design ensures that while range of motion is achieved, stability remains intact.

4. Muscle Attachment

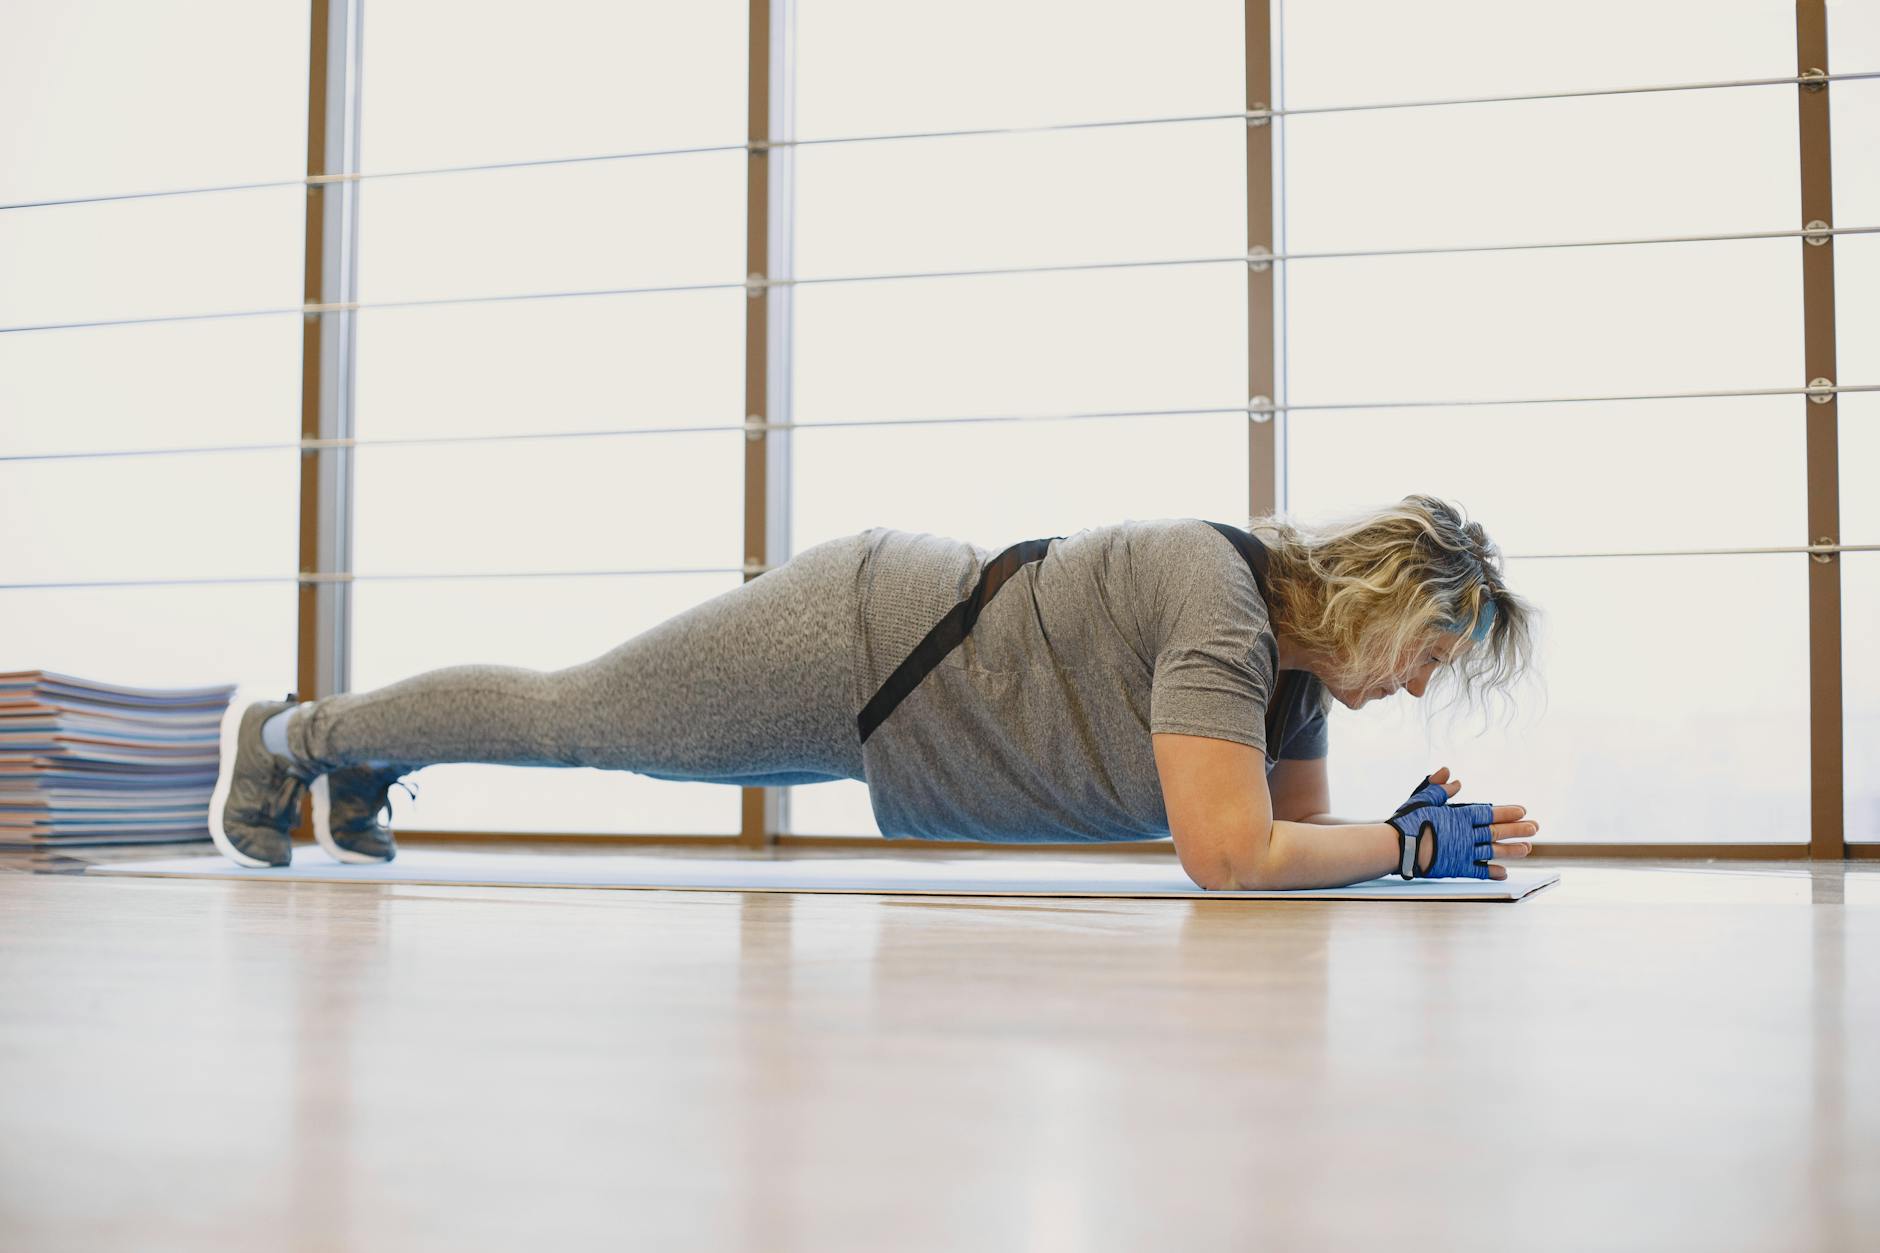
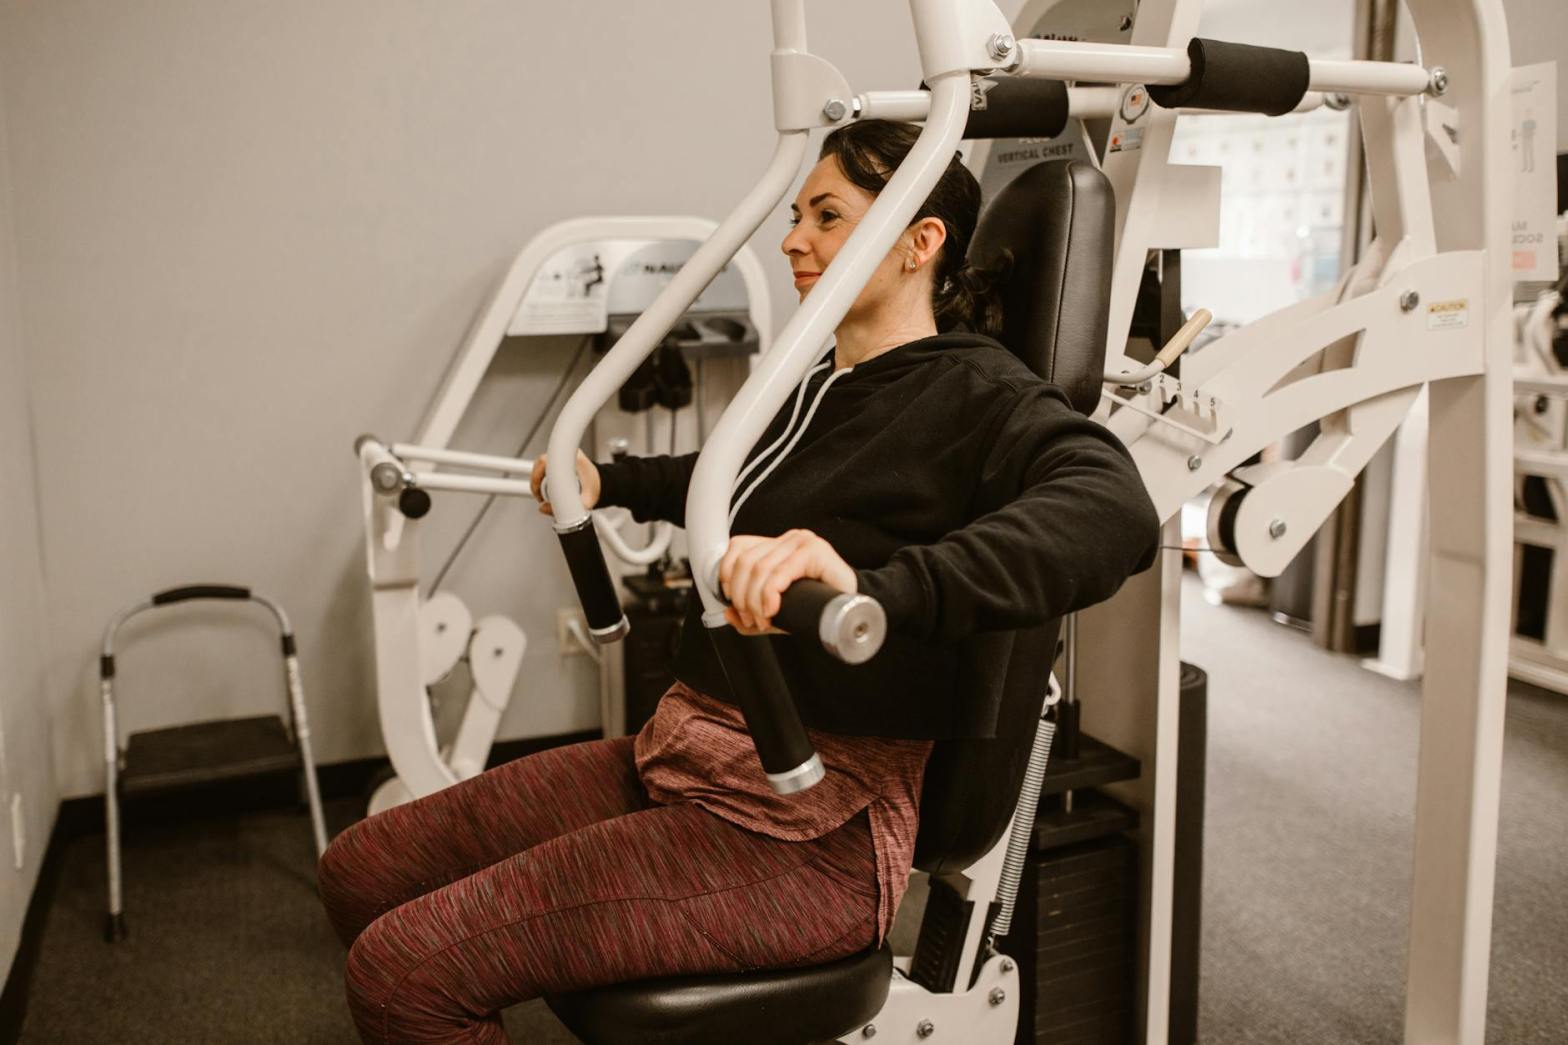
Various muscles attach to the spine, including the erector spinae, multifidus, and abdominal muscles (Yes!). These muscles work in concert to stabilize the spine during movement, preventing excessive motion that could lead to injury. A strong core, working alongside the spinal structure, enhances overall stability.

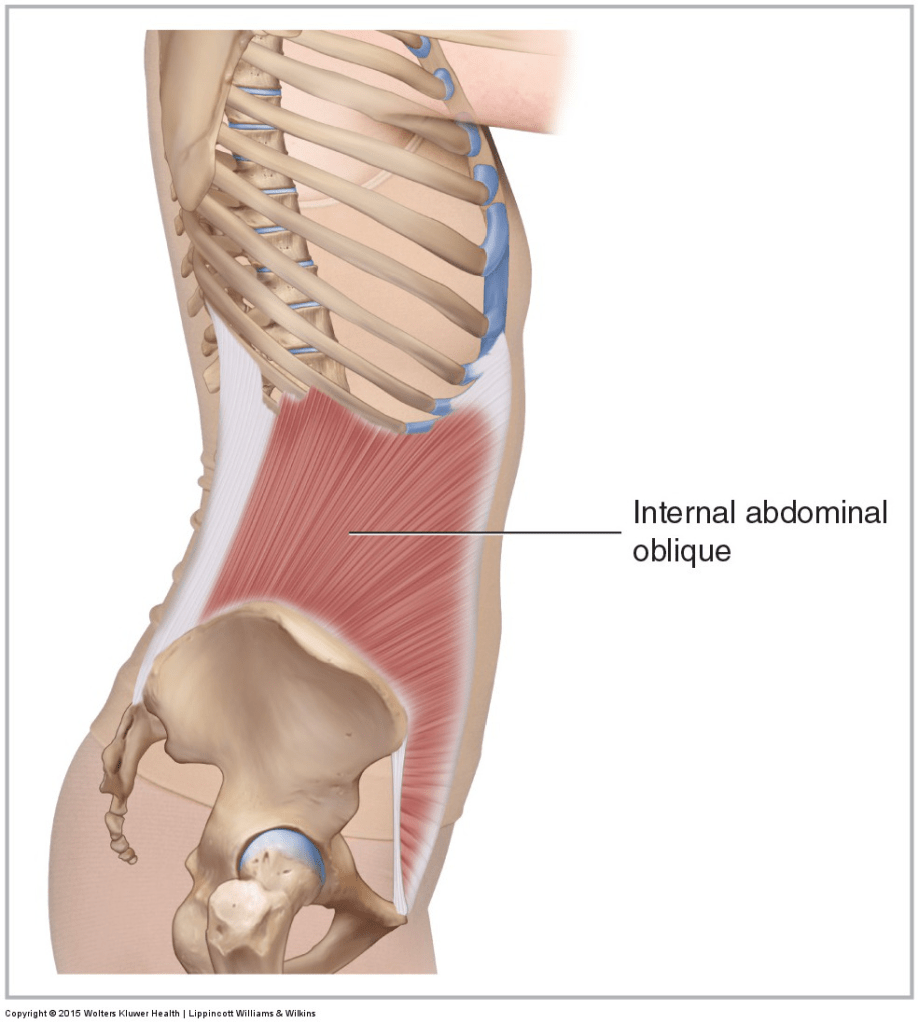
Figure 26. Lateral view of the right internal abdominal oblique. Courtesy Joseph E. Muscolino. Manual Therapy for the Low Back and Pelvis – A Clinical Orthopedic Approach (2015).

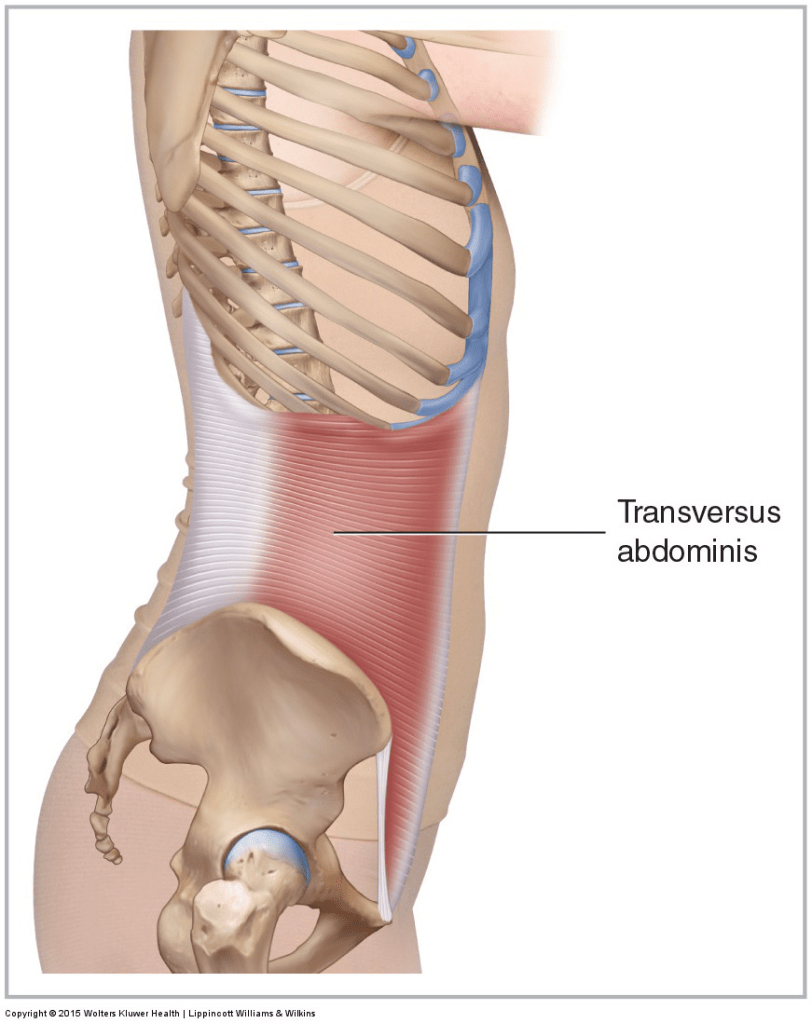
Figure 27. Lateral view of the right transversus abdominis. Courtesy Joseph E. Muscolino. Manual Therapy for the Low Back and Pelvis – A Clinical Orthopedic Approach (2015).

5. Proprioception and Balance

The spine contributes to proprioception—the body’s ability to sense its position and movement in space. Spinal nerves provide feedback to the central nervous system, allowing for better balance and coordination while moving. This is particularly important in dynamic activities such as sports, dance, and even everyday tasks like walking on uneven surfaces.

Photo by Greta Hoffman on Pexels.com

Conclusion

The spine is essential for maintaining stability while allowing for a wide range of movements. Through its structural components, load distribution capabilities, and muscle attachments, it not only supports overall body function but also plays a crucial role in protecting against injury during movement. Understanding the spine’s role can help individuals take better care of their back health and enhance their physical performance. By supporting spinal health through proper posture, strength training, and core exercises, one can ensure a stable and active lifestyle.

Photo by Gustavo Fring on Pexels.com

A Step-by-Step Tutorial on How to Train the Heart

Training the heart is essential for overall cardiovascular health. Here’s a step-by-step guide to effectively train your heart through cardiovascular exercises:

Step 1: Set Clear Goals

  • Determine your fitness objectives, such as improving endurance, losing or maintaining weight, or preparing for a specific event. Having clear goals will help you stay motivated.

Step 2: Choose Suitable Cardiovascular Activities

  • Select exercises that you enjoy and can sustain over time. Here are some effective options:
    • Running, jogging, or jogging in place
    • Cycling
    • Swimming
    • Jump rope
    • Dancing
    • Rowing
    • Brisk Walking
    • Bear Crawls
    • Burpees
    • Water Aerobics
    • Martial Arts
    • Cutting the Lawn
    • You Name It!

Step 3: Start Slowly

  • If you’re new to exercise, begin with 10-15 minutes of light activity. Gradually increase the duration and intensity to prevent injury. Your muscles, tendons, ligaments, even joints, arteries and nerves have to play catch up. Give yourself about 3 months for your body to gradually adjust.

Step 4: Create a Weekly Schedule

  • Aim for at least 150 minutes of moderate-intensity or 75 minutes of high-intensity cardiovascular exercise each week. Example of a cross-training schedule:
    • Monday: 30 minutes of jogging
    • Tuesday: 25 minutes of rowing
    • Wednesday: 30 minutes of cycling
    • Friday: 20 minutes of swimming
    • Saturday: 45 minutes of hiking

Step 5: Monitor Your Heart Rate

  • Use a heart rate monitor or fitness tracker to ensure you’re exercising within the recommended heart rate zones. Aim for 50-85% of your maximum heart rate. You don’t need to max out your heart rate for effective blood transport.

Step 6: Prioritize Consistency

  • Stay consistent with your cardio workouts by sticking to your schedule. Make adjustments as needed but try to maintain a regular routine. This is key. It’s not a routine it’s a lifestyle change. If you’re not ready to do it on your own, ask a fitness professional. Do you have 3 months to commit?

Step 7: Combine with Strength Training

  • Incorporate strength-training exercises at least two times a week. Building muscle can enhance your heart’s efficiency.

Step 8: Stay Hydrated and Eat Well

  • Proper nutrition and hydration support your heart training. Focus on a balanced diet rich in fruits, vegetables, whole grains, and lean proteins.

Step 9: Track Your Progress

  • Keep a journal or use an app to log your workouts, heart rate, and any changes in your fitness level. Celebrate milestones to stay motivated.

Step 10: Consult with a Professional

  • If you’re unsure where to start or have existing health concerns, consult with a fitness professional or healthcare provider for personalized guidance.

By following these steps, you’ll effectively train your heart, enhancing its performance and your overall fitness level.

What Exactly is Metabolic Syndrome?

Metabolic syndrome is a complex cluster of conditions that increase the risk of heart disease, stroke, and type 2 diabetes. It involves various metabolic factors and is a significant public health concern.

The Syndrome

Metabolic syndrome is diagnosed when an individual has a combination of at least three of the following risk factors:

  1. Abdominal Obesity: This is often measured by waist circumference. A waist measurement of 40 inches or more in men and 35 inches or more in women is considered a risk factor.
  2. High Blood Pressure (on the arterial wall): Blood pressure readings of 130/85 mmHg or higher are considered as part of the syndrome.
  3. Increased Blood Sugar (Glucose) Levels: A fasting blood sugar level of 100 mg/dL or higher indicates insulin resistance or pre-diabetes.
  4. High Triglyceride (Energy Source) Levels: Triglyceride levels of 150 mg/dL or higher are associated with metabolic syndrome.
  5. Low HDL (Good) Cholesterol Levels: A reading of less than 40 mg/dL in men and less than 50 mg/dL in women is considered a risk.

Causes of Metabolic Syndrome

Several factors contribute to the development of metabolic syndrome, including:

  • Obesity: Especially central obesity, where fat accumulates around the abdomen.
  • Insulin Resistance: The body’s cells become less responsive to insulin, leading to higher blood sugar levels.
  • Physical Inactivity: A sedentary lifestyle contributes to weight gain and associated health risks.
  • Genetics: Family history can play a role in the development of metabolic syndrome.
  • Aging: Risk increases as people get older, particularly after the age of 40.

Symptoms

Metabolic syndrome typically does not present clear symptoms. However, the following may be observed:

  • Excess fat around the waist
  • Fatigue
  • Dark patches of skin (acanthosis nigricans), commonly found in folds of skin
  • Elevated blood pressure and glucose levels may be detected during routine medical examinations

Health Risks

Individuals with metabolic syndrome are at a higher risk for:

  • Cardiovascular Diseases: The cluster of conditions raises the likelihood of heart attacks and strokes.
  • Type 2 Diabetes: Insulin resistance often leads to elevated blood sugar levels and diabetes.
  • Fatty Liver Disease: Excess fat can accumulate in the liver, leading to liver diseases.
  • Kidney Disease: The added strain on the kidneys can lead to chronic kidney disease.

Management and Prevention

Managing and preventing metabolic syndrome includes lifestyle modifications such as:

  • Healthy Diet: Emphasizing fruits, vegetables, whole grains, lean protein, and healthy fats while reducing processed foods and sugars.
  • Regular Exercise: Aiming for at least 150 minutes of moderate intensity exercise each week. For example, a 15-minute walk in the morning and a 15-minute walk in the evening 5 days a week.
  • Weight Loss: Even a modest weight loss of 5-10% can significantly reduce risk factors.
  • Regular Health Checkups: Monitoring blood pressure, cholesterol, and glucose levels can help in early detection and management.

Conclusion

Metabolic syndrome is a critical health issue that can lead to severe complications if not addressed. Understanding the risk factors and committing to a healthier lifestyle are essential steps in managing this condition and reducing the associated health risks. Regular check-ups with healthcare professionals ensure that one can take proactive measures towards a healthier future.

Photo by Dean Ha on Pexels.com

Baby steps…

The Pectoralis Major

The pectoralis major is a large, fan-shaped muscle situated at the front of the chest. This vital muscle plays a key role in various upper body movements and is essential for both strength training and everyday activities.

Anatomy of the Pectoralis Major

The pectoralis major has two primary components: the clavicular head and the sternal head.

  • Clavicular Head: Originating from the medial half of the clavicle, this part is responsible for flexing the humerus (the upper arm bone) and moving the arm forward.
  • Sternal Head: This portion arises from the sternum and the first six ribs. It plays a crucial role in adducting (bringing the arm toward the body) and internally rotating the shoulder.

Both heads insert at the greater tubercle of the humerus, making them effective in controlling arm movements.

Function of the Pectoralis Major

The pectoralis major is instrumental in several movements of the shoulder joint:

  1. Adduction of the Arm: It allows the arms to move closer to the body.
  2. Flexion of the Arm: It helps in raising the arm forward.
  3. Internal Rotation of the Arm: This enables the arm to turn inward.

These functions are commonly utilized in various activities such as pushing, throwing, and lifting.

Importance in Exercise and Strength Training

The pectoralis major is heavily targeted in strength training exercises. Some popular exercises aimed at strengthening this muscle include:

  • Bench Press: Engages both heads of the pectoralis major and is a fundamental exercise for building chest strength.
  • Push-Ups: A bodyweight exercise that works the chest, shoulders, and triceps.
  • Chest Flys: Focuses on isolating the pectoralis major, allowing for a greater range of motion.

Regularly strengthening the pectoralis major contributes to better performance in sports and physical fitness, strengthens the heart, promotes muscular balance, and helps prevent injuries.

Common Injuries

Like any muscle group, the pectoralis major can be susceptible to injuries, particularly through overuse or improper technique during exercise. Common injuries may include strains or tears, which can happen when lifting heavy weights without adequate warm-up or when performing repetitive overhead activities without proper form.

Conclusion

The pectoralis major is a fundamental muscle in the upper body, crucial for numerous physical activities and exercises. Understanding its role, anatomy, and function can help individuals optimize their workouts, enhance upper body strength, and reduce the risk of injuries. Whether you’re a fitness enthusiast or simply looking to improve your overall health, giving attention to this muscle is beneficial for achieving your physical goals.

Foam Roll Plank Saw

The foam roll plank saw is an exercise that effectively bridges the gap between core stability and upper body strength. This dynamic movement not only targets the core but also actively engages the arms, through the serratus anterior muscles, enhancing overall muscular coordination.

How It Works

  1. Starting Position: Begin in a low plank position with your forearms placed on a foam roller. Ensure your body forms a straight line from head to heels, engaging your core throughout this position.
  2. Plank Mechanics: While maintaining the plank, shoulders externally rotated, forearms pushing down into the foam roll. Squeeze your legs together, squeeze your abs, squeeze your glutes and quads to become very stable. This setup engages the serratus anterior, external rotators of the shoulders, and core which are crucial for maintaining stability in an overhead press.
  3. The Saw Motion: As you perform the saw motion, gently roll the foam roller forward and backward. This action requires control and precision, further engaging the arms. The pushing and pulling motion not only strengthens the upper body but also challenges the stability of the core.
  4. Core Engagement: The primary goal of the foam roll plank saw is to keep the core stable, while the arms are moving. As you roll, your serratus anterior, abdominals and obliques must work hard to support the movement, allowing the arms to seamlessly contribute to maintaining alignment.
  5. Muscular Synergy: This exercise exemplifies the synergy between the core and upper body. As the arms push and pull the foam roller, they help in transferring the strength needed to keep the torso stable, effectively linking upper body strength to core stability.

Benefits

  • Increased Core Stability: The demanding nature of the foam roll plank saw enhances core strength, crucial for all athletic movements.
  • Arm Activation: By involving the arms in the plank, this exercise broadens the scope of the plank drill, leading to improved strength and endurance.
  • Enhanced Coordination: Performing the saw movement requires coordination and balance, making it perfect for functional training.

Incorporating the foam roll plank saw into your fitness routine not only adds variety but also offers a comprehensive approach to strengthening both the core and upper body simultaneously.

Do not attempt if you have a shoulder injury!

Feeling the Pressure?

The Silent Killer

Monitoring blood pressure is essential for maintaining heart health and overall well-being. There are often no warning signs before a heart attack caused by high blood pressure. So, here’s a comprehensive guide on understanding and measuring blood pressure effectively.

Learn the Basics of Blood Pressure

  • Definition: Blood pressure is the force of blood against the walls of your arteries as your heart pumps it around your body.
  • Components: Blood pressure readings consist of two numbers:
    • Systolic Pressure: The higher number, measures the pressure in your arteries when your heart beats.
    • Diastolic Pressure: The lower number, measures the pressure in your arteries when your heart rests between beats.

Know the Blood Pressure Categories

Understanding the categories of blood pressure can help identify health risks:

  • Normal: Less than 120/80 mmHg
  • Elevated: Systolic between 120-129 and diastolic less than 80
  • Hypertension Stage 1: Systolic between 130-139 or diastolic between 80-89
  • Hypertension Stage 2: Systolic of 140 or higher or diastolic of 90 or higher
  • Hypertensive Crisis: Systolic over 180 and/or diastolic over 120 (immediate medical attention required)

Gather Necessary Equipment

To measure blood pressure, you will need:

  • A blood pressure monitor (manual or automatic)
  • A comfortable and quiet space

Prepare for the Measurement

  1. Rest: Sit quietly for at least 5 minutes before measuring.
  2. Posture: Sit in a chair with your back supported, feet flat on the ground, and arm at heart level.
  3. Avoid: Don’t drink caffeine, smoke, or exercise 30 minutes prior to the measurement.

Measuring Blood Pressure

Using an Automatic Blood Pressure Monitor

  1. Wrap the cuff around your upper arm, about an inch above the elbow.
  2. Press the start button.
  3. Wait for the machine to display your readings.
Photo by cottonbro studio on Pexels.com

Using a Manual Blood Pressure Monitor

  1. Wrap the cuff around your arm, ensuring it’s snug but not too tight.
  2. Place the stethoscope over the brachial artery (inner elbow).
  3. Inflate the cuff by pumping the bulb until the pressure is about 30 mmHg above your expected systolic.
  4. Slowly release the air from the cuff while listening through the stethoscope:
    • The first sound you hear is the systolic pressure.
    • The last sound you hear is the diastolic pressure.
  5. Record your reading.
Photo by Lagos Food Bank Initiative on Pexels.com

Keep a Record

Maintain a log of your blood pressure readings over time to track changes and share with your healthcare provider. Note the date, time, and any relevant activities that may affect your readings.

Understand When to Consult a Doctor

If you consistently record high readings (especially above 130/80 mmHg), or experience symptoms such as headaches, dizziness, or shortness of breath, consult a healthcare professional for further evaluation.

Conclusion

If you’re feeling pressure in the chest don’t ignore it. Regularly monitoring your blood pressure is vital for your health. Understanding how to measure it accurately allows you to take proactive steps toward managing your cardiovascular health effectively. Always consult with a healthcare professional for tailored advice and recommendations.

Photo by Puwadon Sang-ngern on Pexels.com

Bicep Brachii Trigger Points

Understanding Trigger Points in the Biceps Brachii and Their Impact on Shoulder Pain

Trigger points are hyperirritable spots in skeletal muscle that are associated with palpable nodules in taut bands of muscle fibers. These points can refer pain to other areas, leading to discomfort and complications. One such area involves trigger points in the biceps brachii, a muscle located in the upper arm.

Anatomy of the Biceps Brachii

The biceps brachii consists of two heads: the long head and the short head. The biceps brachii is primarily responsible for elbow flexion and supination of the forearm. Its origin at the scapula and insertion at the radius (short head) allows it to have a significant role not only in arm movement but also in stabilizing (long head) the shoulder joint.

Trigger Points in the Biceps Brachii

When trigger points develop in the biceps brachii, they can evoke pain not only in the muscle itself but also in surrounding areas. Common causes of trigger points include:

  • Overuse during activities such as weightlifting or repetitive overhead movements
  • Poor posture that places undue stress on the shoulder girdle
  • Trauma or direct injury to the arm or shoulder area

Referral Patterns

Image courtesy of Travell, Janet; Simons, David. Travell and Simons’ Trigger Point Flip Charts (p. 8). LWW. Kindle Edition.

One of the key characteristics of trigger points is their referral pattern. When trigger points form in the biceps brachii, they can refer pain to:

  • The shoulder region
  • The elbow region

Referral in the shoulder can lead to discomfort that may feel like it originates from within the shoulder joint.

How Bicep Trigger Points Cause Pain Near the Scapula and Humerus

The scaption (scapular plane elevation) during shoulder movements engages the biceps brachii and can aggravate any existing trigger points, leading to pain in these areas. The pain may manifest as:

  • Sharp pain in the shoulder
  • Difficulty with overhead movements

As the muscles around the shoulder region tighten in an attempt to compensate for the pain, this can further aggravate the discomfort and limit range of motion.

Management and Treatment

Effective management of trigger points in the biceps brachii often includes a combination of:

  1. Rest and Recovery: Allowing time for the muscle to heal and reducing activities that exacerbate pain.
  2. Physical Therapy: Engaging a professional can help in utilizing specific exercises and stretches to release tension.
  3. Manual Therapy: Techniques such as deep tissue massage can directly target trigger points, helping to alleviate pain and restore function.
  4. Posture Correction: Adjusting posture during daily activities can prevent the recurrence of trigger points.
  5. Use of Heat or Ice: Applying heat can promote blood flow to the muscle, while ice can reduce inflammation during acute flare-ups.

Conclusion

Understanding the relationship between trigger points in the biceps brachii and shoulder pain is an option for effective treatment. By recognizing the symptoms and employing appropriate therapeutic strategies, individuals can significantly reduce discomfort and improve their shoulder mobility. Early intervention and a proactive approach to stretching and strengthening exercises can help prevent the formation of new trigger points, promoting long-term shoulder health.

Photo by Andrea Piacquadio on Pexels.com

The Up/Down Plank

A Dynamic Core Connection Exercise

The Up/Down Plank is an engaging and effective variation of the traditional plank that emphasizes core stability while also integrating upper body strength. This exercise is not only beneficial for athletes but can be adapted for individuals at various fitness levels. Here’s an in-depth look at how it works and why you should incorporate it into your workout routine.

What is the Up/Down Plank?

The Up/Down Plank, also known as the Plank to Push-Up or Plank Up, involves transitioning between a forearm plank position and a high plank (push-up position). This dynamic movement not only challenges the core but also engages the shoulders, chest, and triceps.

Benefits of the Up/Down Plank

  1. Core Strength: The Up/Down Plank primarily targets the abdominal muscles, enhancing core stability and strength. A strong core is essential for overall athletic performance and daily activities.
  2. Upper Body Engagement: Transitioning from the forearm plank to the high plank effectively works the shoulders, arms, and chest, providing a balanced strength training session.
  3. Improved Stability: This exercise trains your body to maintain balance and stability through dynamic movements, which is beneficial for other physical activities.

How to Perform the Up/Down Plank

Step-by-Step Instructions

  1. Starting Position: Begin in a forearm plank position, with your elbows directly beneath your shoulders, body in a straight line from head to heels.
  2. Transition to High Plank:
    • Press into your right hand and rotate your body, bringing your right arm straight to lift into a high plank.
    • Follow with your left hand, coming into the high plank position where your hands are shoulder-width apart.
  3. Return to Forearm Plank:
    • Place your right forearm back down on the ground, followed by your left arm, returning to the starting position.
  4. Repeat: Continue alternating sides for a number of repetitions or for a designated time.

Tips for Effective Execution

  • Maintain Alignment: Keep your body in a straight line throughout the movement to avoid straining your back.
  • Engage Your Core: Focus on engaging your abdominal muscles as you transition between positions.
  • Controlled Movements: Perform the transitions slowly and with control to maximize the effectiveness of the exercise and minimize the risk of injury.

Modifications and Variations

  • Knee Support: If you’re a beginner, perform the Up/Down Plank from your knees to reduce difficulty while still working the core.
  • Weighted Plank: For an added challenge, you can place a weight on your back while performing the exercise.
  • Side Plank Variation: After completing the Up/Down Plank, incorporate side planks to further challenge your obliques.

Conclusion

The Up/Down Plank is an excellent addition to any workout routine, offering numerous benefits that enhance both core and upper body strength. This exercise not only promotes physical fitness but also helps in developing balance and coordination. Whether you’re an experienced athlete or just starting your fitness journey, the Up/Down Plank can provide a valuable workout experience. Consider incorporating it into your routine to enjoy the full benefits it has to offer.

The Mediterranean Diet

The Mediterranean Diet is not just a diet but a lifestyle choice that promotes a healthy way of eating inspired by the traditional cuisines of countries bordering the Mediterranean Sea, such as Greece, Italy, and Spain. This dietary pattern emphasizes the consumption of fresh, wholesome foods and is recognized for its health benefits, particularly in promoting heart health and preventing chronic diseases.

Key Components of the Mediterranean Diet

  1. Fruits and Vegetables: The diet is rich in fruits and vegetables, which provide essential vitamins, minerals, and antioxidants. Aim for a vibrant variety in colors and types to maximize nutrient intake.
  2. Whole Grains: Whole grain products, like brown rice, whole wheat bread, and quinoa, are staples of the Mediterranean Diet. They serve as a primary source of carbohydrates and fiber, promoting digestive health.
  3. Healthy Fats: Olive oil is the principal source of fat in this diet, celebrated for its heart-healthy monounsaturated fats. It is often used in cooking, dressings, and dips. Nuts and seeds are also encouraged, providing healthy fats and protein.
  4. Lean Proteins: The Mediterranean Diet emphasizes fish and seafood as primary protein sources, promoting fish consumption at least twice a week. Poultry, eggs, and dairy (mainly yogurt and cheese) are consumed in moderation, while red meats are limited.
  5. Herbs and Spices: Flavor is enhanced through the use of herbs and spices instead of salt. Commonly used herbs include basil, oregano, and rosemary, which also offer additional health benefits.
  6. Wine in Moderation: While not essential, moderate consumption of red wine (1 glass) during a meal is common in Mediterranean cultures. If alcohol is consumed, it should be done mindfully and in moderation.
  7. Physical Activity: Alongside dietary components, the Mediterranean lifestyle encourages regular physical activity, promoting overall health and well-being.

Health Benefits of the Mediterranean Diet

Research has shown a multitude of benefits associated with the Mediterranean Diet, including:

  • Heart Health: The diet is linked to lower risks of heart disease. Its emphasis on healthy fats, whole grains, and nutrients-rich foods contributes to better cardiovascular health.
  • Weight Management: Due to its focus on whole foods and balanced meals, the Mediterranean Diet can aid in weight management and may help with obesity prevention.
  • Reduced Risk of Chronic Diseases: Studies indicate that following this diet may lower the risk of conditions such as type 2 diabetes, Alzheimer’s disease, and certain cancers.
  • Improved Brain Function: The abundance of antioxidants and healthy fats supports cognitive health and may lower the risk of neurodegenerative diseases.

Getting Started with the Mediterranean Diet

To adopt the Mediterranean Diet, consider these tips:

  • Start Small: Incorporate more fruits, vegetables, and whole grains into your meals gradually.
  • Cook With Olive Oil: Replace butter and other fats with olive oil for cooking and dressings.
  • Explore Seafood: Include fish and seafood in your weekly meal plan, aiming for at least two servings a week.
  • Limit Processed Foods: Reduce the intake of processed foods and sugar-laden snacks. Focus on cooking with fresh, whole ingredients.
  • Stay Hydrated: Drink plenty of water throughout the day and consider moderate wine consumption (1 glass) with a meal if desired.

Conclusion

The Mediterranean Diet is a sustainable and enjoyable approach to eating that celebrates rich flavors and promotes health. By focusing on whole foods, healthy fats, and a balanced lifestyle, it offers a roadmap to not just a diet, but a way of living that nurtures both the body and the spirit. Whether you’re looking to improve your health or simply expand your culinary horizons, the Mediterranean Diet offers delicious and nutritious options that can make a meaningful difference in your life.

Photo by Pavel Danilyuk on Pexels.com

The Levator Scapulae

Understanding the Levator Scapulae Muscle

The levator scapulae is a significant muscle located in the posterior neck region, and connects from the neck to the shoulder, playing a vital role in movement and posture. Understanding its anatomy, function, and common issues can help in maintaining good health and preventing injuries.

Anatomy of the Levator Scapulae

The levator scapulae is a thin, strap-like muscle that stretches from the cervical vertebrae to the scapula. Here are its key features:

  • Origin: The muscle originates from the transverse processes of the first four cervical vertebrae (C1 to C4).
  • Insertion: It inserts into the medial border of the scapula, specifically the superior angle and the upper portion of the medial border.

Function of the Levator Scapulae

The primary functions of the levator scapulae include:

  1. Shoulder Movement: The levator scapulae elevates the scapula, allowing for shoulder shrugging and facilitating movements above shoulder level.
  2. Neck Flexion: This muscle assists in the lateral flexion of the neck, allowing for side bending.
  3. Rotation of the Neck: It can also aid in the rotation of the neck towards the same side.
  4. Postural Stability: The levator scapulae contributes to maintaining proper posture and alignment of the cervical spine.

Common Issues and Injuries

Due to its location and function, the levator scapulae can be subject to several issues:

  • Tension and Strain: Prolonged poor posture, such as slouching or craning the neck forward, can lead to tightness and strain in the levator scapulae. This results in discomfort or pain in the neck and shoulders.
  • Trigger Points: These are tight bands of muscle fibers that can develop within the levator scapulae, causing referred pain in the neck, head, or even upper back.
  • Injury: Acute injuries during physical activities or accidents can compromise the levator scapulae’s function, leading to pain and restricted movement.

Management and Treatment

To maintain the levator scapulae’s health and address potential issues, consider the following methods:

  • Stretching and Strengthening: Incorporating stretches behind the neck and strength exercises for the front of the neck can improve flexibility and reduce tightness.
  • Postural Awareness: Focus on maintaining good posture, especially during prolonged sitting or standing. Ergonomic adjustments to your workspace can also be beneficial.
  • Physical Therapy: If pain or dysfunction persists, consulting a physical therapist can provide targeted treatments and exercises tailored to your needs.
  • Massage Therapy: Light massage gun to the lamina groove of c1-c4 and its insertion at the scapula can relieve tension in the levator scapulae and surrounding muscles, promoting relaxation and better blood flow.

Conclusion

The levator scapulae muscle plays an essential role in shoulder and neck movement, as well as in maintaining proper posture. By understanding its anatomy and function, individuals can take proactive steps to prevent strain and improve their overall musculoskeletal health. If you experience persistent pain or discomfort in this area, consider seeking professional guidance for a tailored treatment plan.

Photo by Andrea Piacquadio on Pexels.com