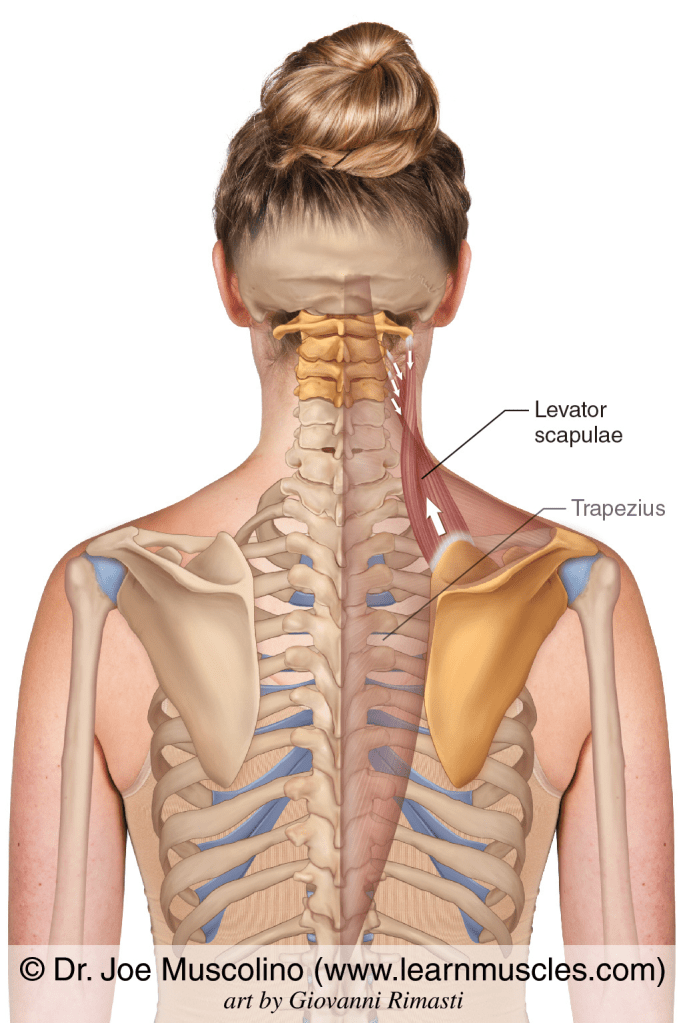
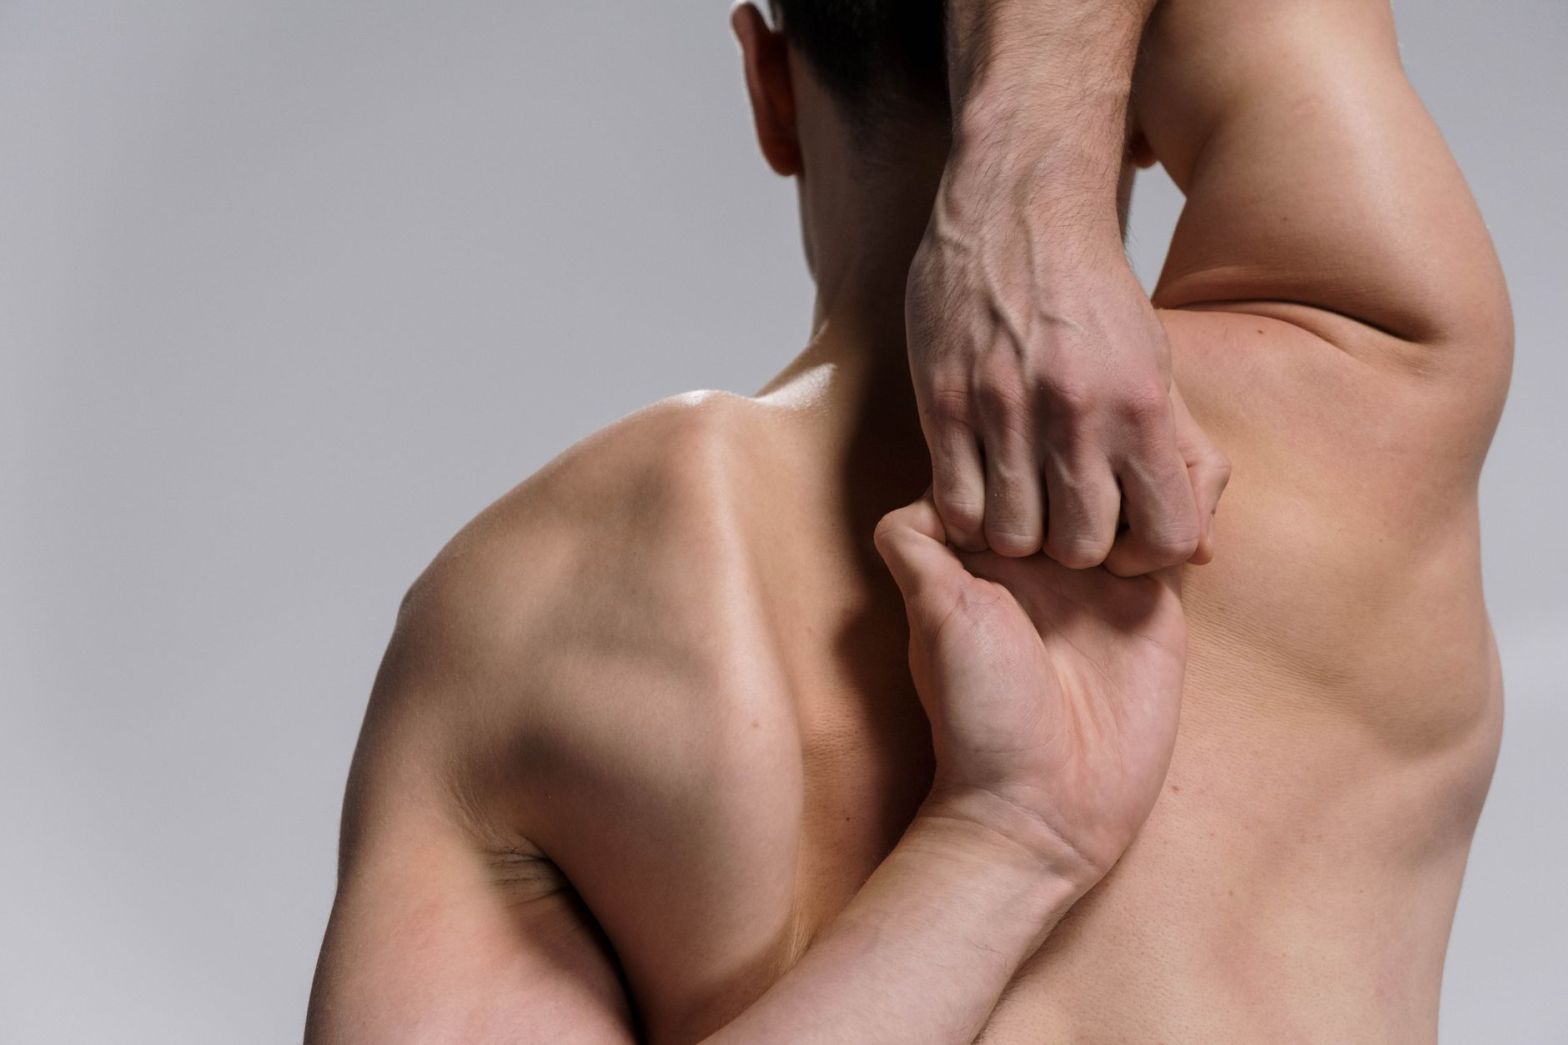
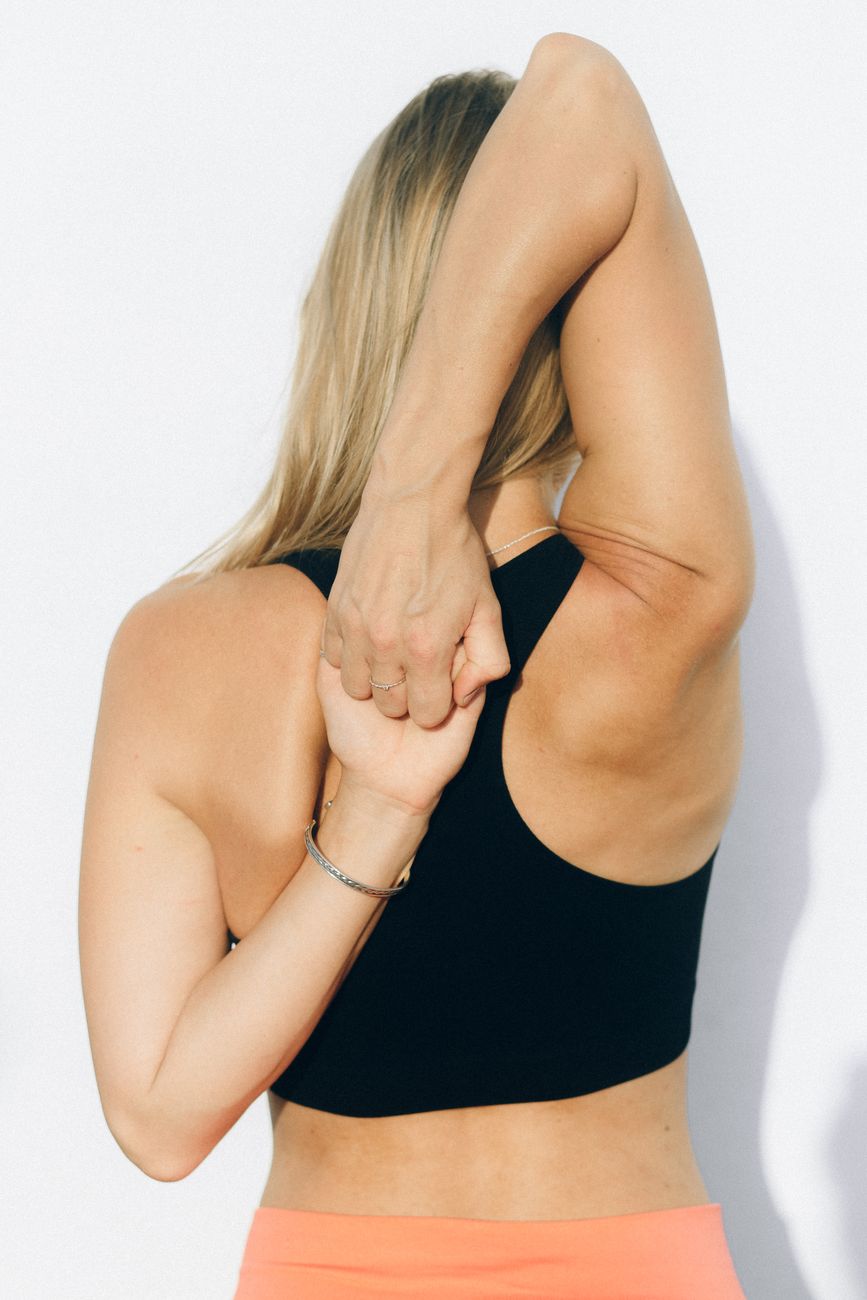
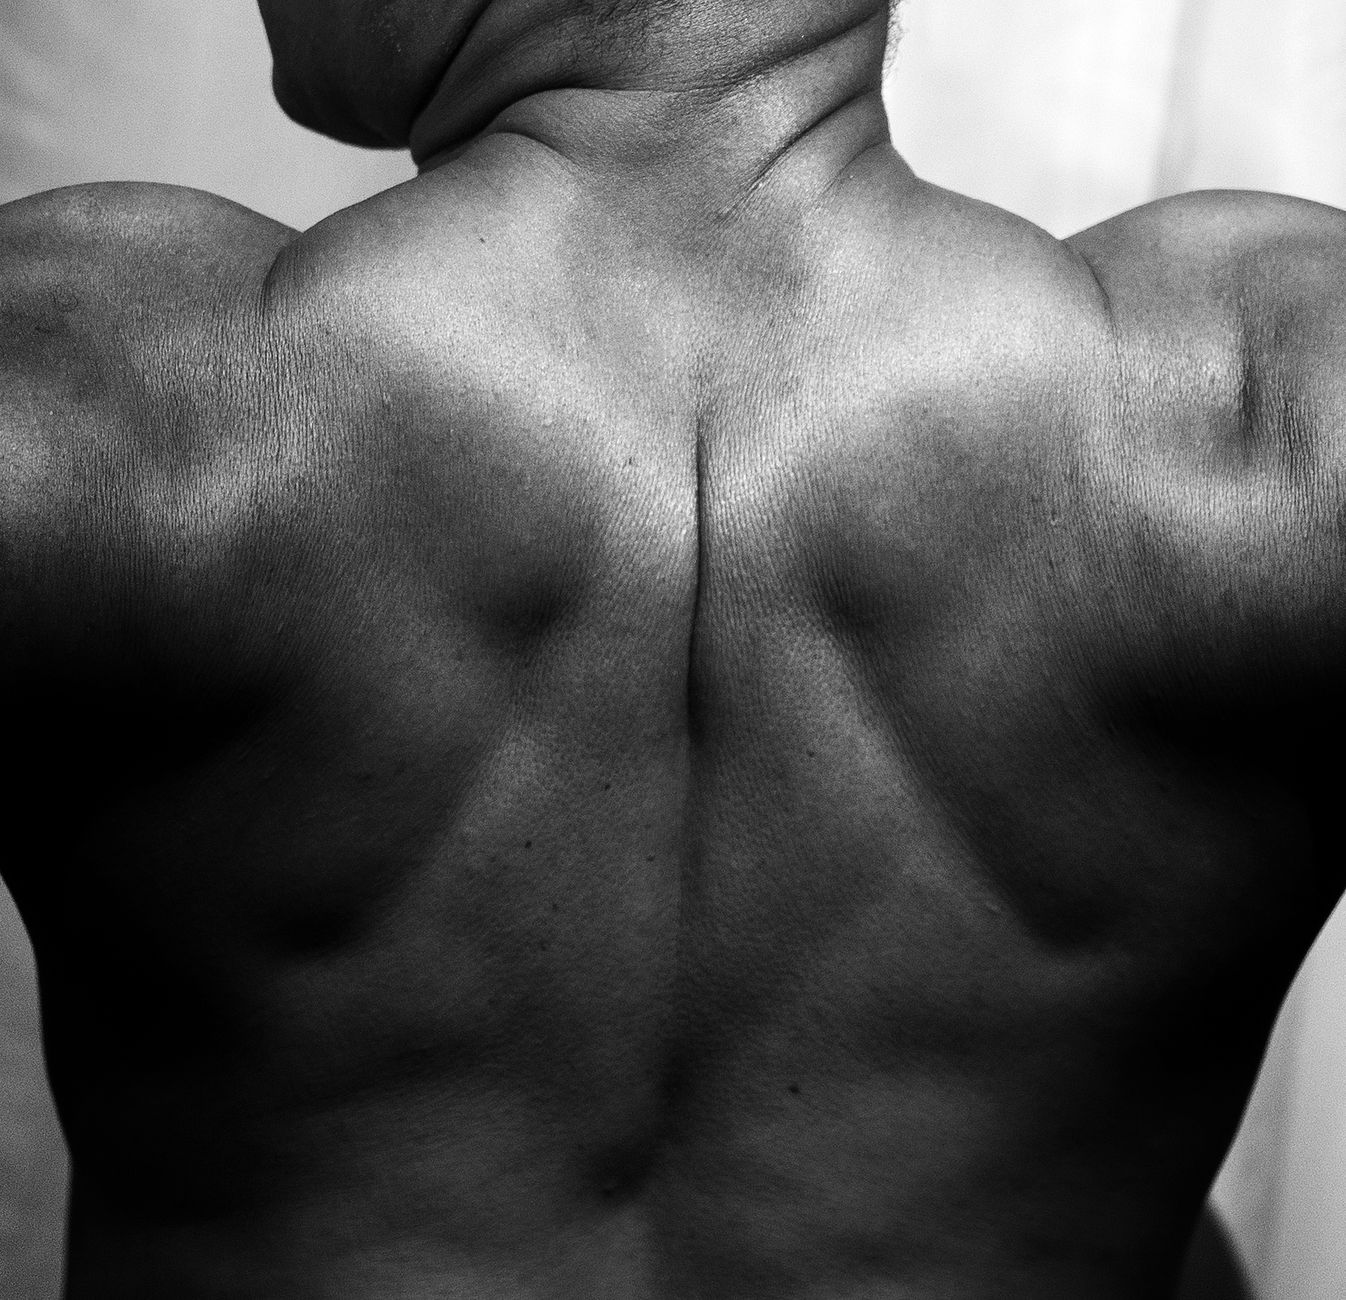
The levator scapulae are a pair of muscles located in the back of the neck. They originate from the transverse processes of the first four cervical vertebrae (C1-C4) and insert onto the superior angle and medial border of the scapula (shoulder blade).
Functions of the Levator Scapulae:
Elevation of the Scapula: They help lift the shoulder blade upward, contributing to shoulder shrugging.
Lateral Flexion of Neck: It helps to tilt the right ear to the right shoulder.
Lateral Rotation of Neck: A levator scapulae helps to rotate the head to the right or left.
Downward Rotation of the Scapula: Pulls the superior angle of the scapula, causing the inferior angle to rotate downward, like bringing the arms down from an overhead position.
Example of Downward Rotation Photo by Ekam Juneja on Pexels.com
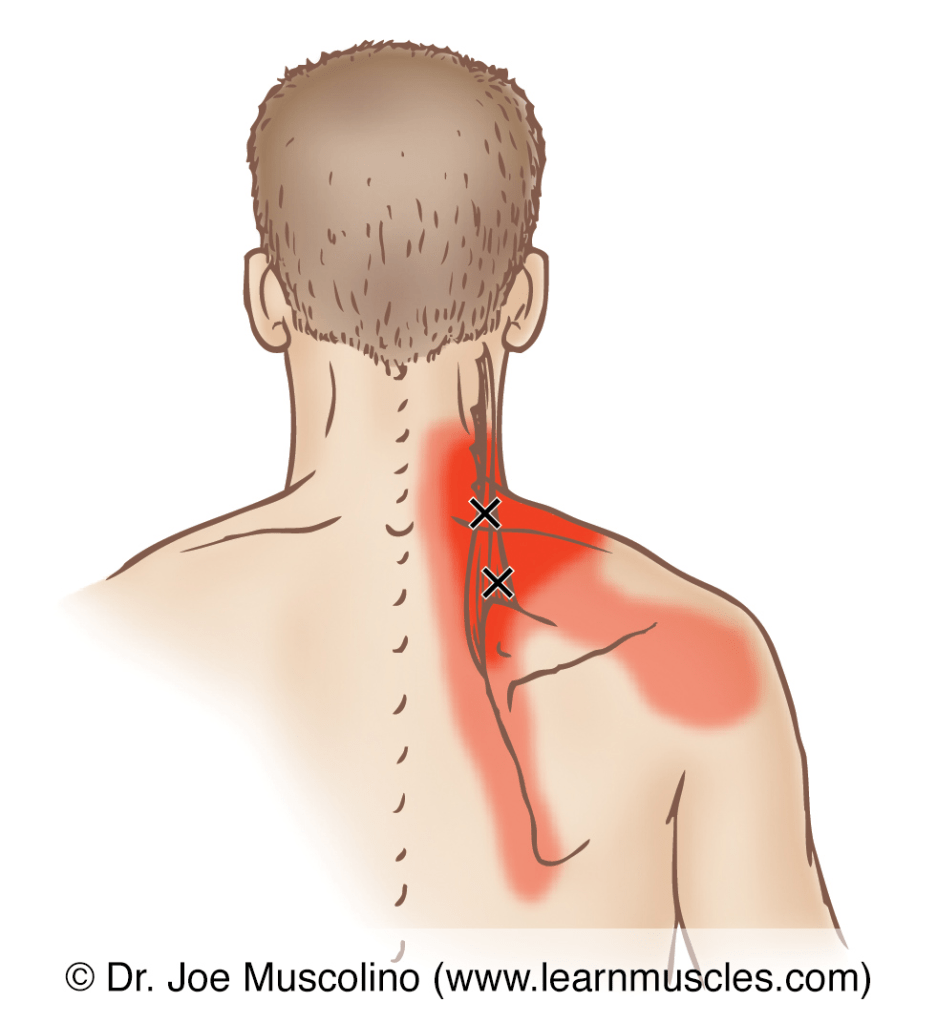
According to Travell and Simons, the levator scapulae muscle has specific trigger points that are associated with muscle tension and pain. Here’s an overview of these trigger points:
Levator Scapulae Trigger Points:
Mid Trigger Point:
Location: Found in the muscle belly of the levator scapulae, approximately midway along its length.
Symptoms: Pain from this trigger point can radiate up to the base of the skull and down to the posterior deltoid. There might be increased tenderness upon palpation of the muscle.
Lower Trigger Point:
Location: Located near the attachment point at the superior angle of the scapula.
Symptoms: This trigger point may refer pain to the upper back and down the medial border of scapula and can cause discomfort during overhead movements or when reaching backward.
Key Points:
Referred Pain Patterns: It’s important to note that the pain caused by trigger points in the levator scapulae does not always localize to the immediate area; it can manifest in various regions, leading to confusion.
Management: Treatment options include manual therapy, dry needling, stretching and strengthening exercises. Addressing these trigger points can significantly improve muscle function and alleviate pain.
Usual Suspects of Trigger Points
Working with two screens at your desk with head turned
Holding your cell phone with your shoulder or looking down at you phone
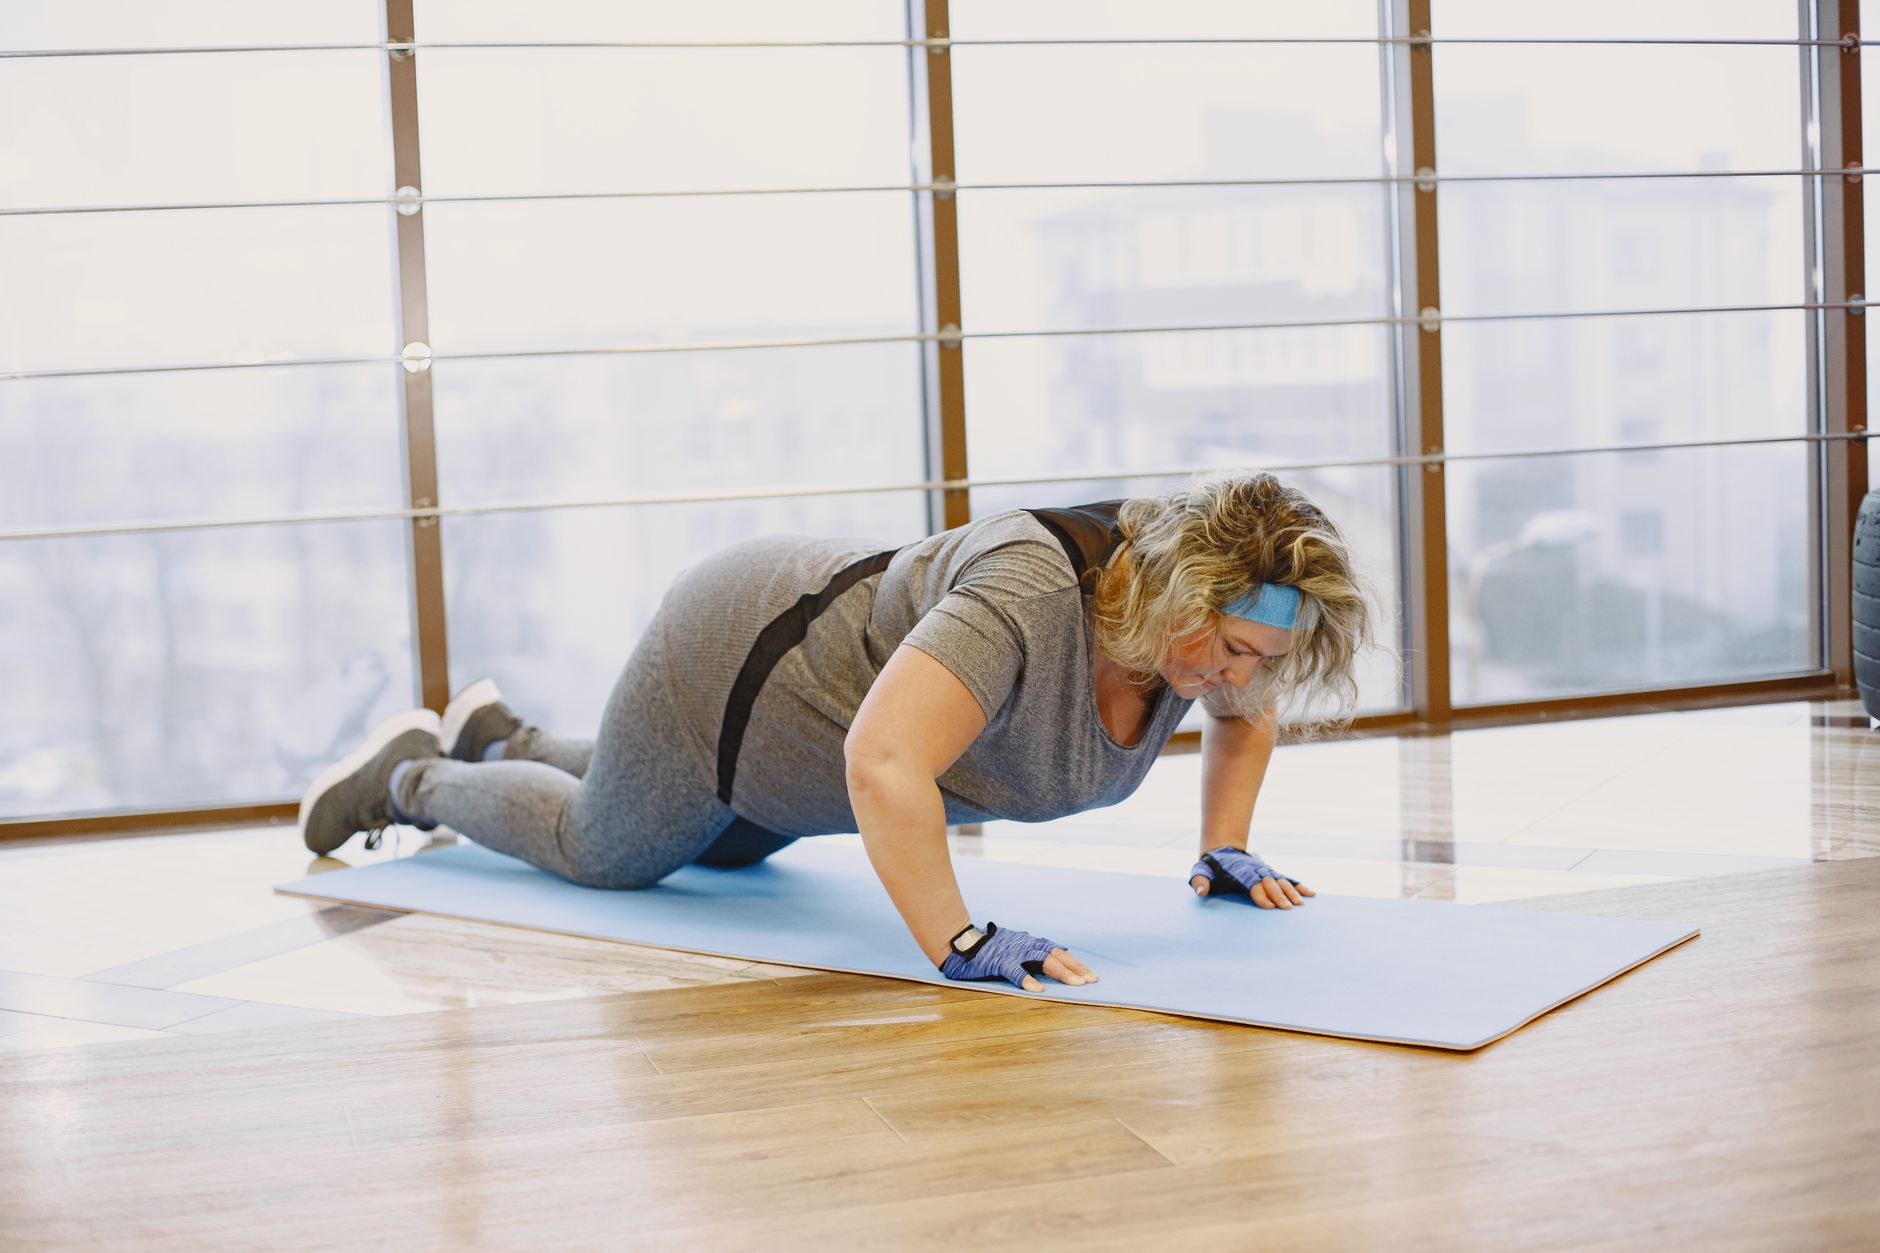
This exercise combines the eccentric push-up with a kneeling concentric push-up. Helping you to focus on building the strength and stability you need to do a standard push up.
Slowly lower your body toward the ground by bending your elbows. Take 3 to 5 seconds to reach the bottom position (chest just above the ground). This focus on control will build strength and stability effectively.
Step 4: Brief Pause
When your chest is just above the ground, pause for a moment while keeping tension in your muscles.
Step 5: Transition to Kneeling
Drop your knees down to the ground while maintaining your upper body position. Your hands should remain where they are, ensuring a steady transition.
From the kneeling position, press through your hands to lift your body back up to the starting kneeling position. Maintain a strong core throughout this phase.
Step 7: Complete One Rep
This completes one full repetition of the exercise.
Step 8: Repeat
Aim for 3 sets of 5-10 repetitions, focusing on the controlled lowering during the eccentric phase and maintaining good form throughout.
Tips for Success
Warm-Up: Always start with a proper warm-up to prepare your muscles and joints. For example, light cardio or even a hot shower if you’re pressed for time.
Maintain Form: Keep your elbows close to your body during both phases to protect your shoulders. This is not necessarily true, but will make your shoulders more stable. Try different hand widths or closed fists if your wrists, elbows, or shoulders trouble you. Don’t be afraid to find a comfortable position that works for you.
Breath Control: Inhale as you lower your body in the eccentric phase and exhale as you push back up in the concentric phase.
Progress Gradually: As you gain strength and confidence, consider transitioning from kneeling to standard push-ups.
By following these steps, you will get one step closer to doing a standard push-up. Happy training!
Health outcomes are influenced by a myriad of factors that extend beyond individual behavior and genetic predisposition. Among these factors, social determinants of health and structural determinants of health play crucial, yet distinct, roles in shaping the health of populations. Understanding the differences and interconnections between these determinants is essential for developing effective public health strategies aimed at reducing health disparities.
Social determinants of health refer to the conditions in which individuals are born, grow, live, work, and age. These determinants encompass a broad range of factors, including economic stability, education, social and community context, health care access, and neighborhood environment. Each of these factors contributes to the overall health of individuals and communities.
Economic Stability: This includes income level, employment status, and financial resources, all of which are critical in determining access to health care, nutrition, and living conditions.
Education: Educational attainment is closely linked to health literacy, which affects individuals’ ability to make informed health decisions. Higher education levels typically lead to better health outcomes.
Social and Community Context: This encompasses the relationships individuals have within their communities, social networks, and societal norms. Social support can mitigate stress and promote healthier lifestyles, while lack of community cohesion can contribute to isolation and poor health outcomes.
Health Care Access: Access to health services is paramount for preventive care, timely treatment, and health education. Barriers such as cost, transportation, and availability can significantly impact health outcomes.
Neighborhood Environment: The physical environment, including access to healthy food, safe housing, and safe recreational spaces, plays a vital role in shaping health behaviors and outcomes.
In contrast, structural determinants of health refer to the broader societal systems and policies that create and sustain economic and social conditions affecting health. These determinants include systemic issues such as governance, policies, and established social norms that can perpetuate inequalities.
Policies and Governance: Legislative frameworks and cultural norms establish the conditions that influence health indirectly. Health policies can dictate the distribution of resources and access to health care, impacting population health on a large scale.
Economic Systems: Political and economic structures, including capitalism and social welfare systems, determine how wealth and resources are distributed throughout society. These structural factors greatly influence poverty rates, income inequality, and overall health outcomes.
Social Inequities: Structural determinants often manifest as systemic racism, discrimination, and social exclusion, which can marginalize certain populations and hinder their access to health-promoting resources.
Global Factors: International trade agreements, migration policies, and global economic conditions also play a role in shaping health outcomes by influencing national policies and resource allocation.
Interconnection Between Social and Structural Determinants
While social and structural determinants are distinct concepts, they are undeniably interconnected. Social determinants can be seen as the manifestation of the broader structural determinants; for instance, economic stability (a social determinant) is often influenced by policies governing wages and employment opportunities (structural determinants). Addressing health disparities, therefore, requires a holistic approach that considers both social and structural determinants.
Public health initiatives aimed at reducing health inequities must navigate these layers of determinants to effectively promote health equity. Programs that focus solely on individual behavior change may fall short if the underlying structural issues, such as poverty and discrimination, are not addressed.
In summary, the distinction between social and structural determinants of health underscores the complexities involved in understanding and addressing health disparities. While social determinants reflect the immediate conditions impacting health, structural determinants establish the frameworks that sustain these conditions. Effective public health strategies must encompass a comprehensive approach that understands and addresses both layers, ultimately paving the way for health equity and improved health outcomes for all individuals.
The piriformis is a small, pear-shaped muscle located in the posterior pelvic region. It is significant for its role in the movement and stabilization of the hip joint.
Origin and Insertion
Origin: The piriformis originates from the anterior surface of the sacrum.
Insertion: It inserts onto the greater trochanter of the femur, a bony prominence on the upper part of the thigh bone.
Function
The primary functions of the piriformis include:
Hip External Rotation: It facilitates the external rotation of the thigh when the hip is extended.
Abduction: It assists in abducting the thigh when the hip is flexed.
Stabilization: The muscle helps stabilize the hip joint during various activities, such as walking, running, and climbing.
Relevance
The piriformis muscle is often discussed in relation to piriformis syndrome, a condition where muscle spasms irritate the sciatic nerve, leading to pain, numbness, and tingling along the back of the leg.
The Quadratus Femoris Muscle
The quadratus femoris is a flat, quadrilateral-shaped muscle located in the posterior hip region. It plays a crucial role in the stabilization and movement of the hip joint.
Origin and Insertion
Origin: The quadratus femoris originates from the lateral border of the ischial tuberosity, which is the bony prominence located at the lower part of the pelvis.
Insertion: It inserts onto the intertrochanteric crest of the femur, which is the ridge between the greater and lesser trochanters at the proximal end of the femur.
Function
The primary functions of the quadratus femoris are:
Hip External Rotation: It acts to externally rotate the thigh at the hip joint.
Horizontal Abduction: It abducts the thigh at the hip joint.
Stabilization: It helps in stabilizing the hip joint during various movements, particularly during walking and running.
The quadratus femoris is often overlooked in discussions about trigger points and myofascial pain syndromes. Most often, people focus on the piriformis because it can develop trigger points that lead to referred pain in the low back or down the leg. Due to the quadratus femoris’ deep positioning and relatively small size, discomfort caused by trigger points may be misattributed to other muscles or conditions such as piriformis syndrome. Recognizing and treating trigger points in this muscle can be essential for addressing hip pain and improving overall mobility.
The prone W Fly to I Fly exercise is an excellent way to strengthen the upper back, improve shoulder stamina, and enhance overall posture. This exercise is performed while lying face down, making it particularly effective for targeting the muscles around the scapulae. Follow these steps to execute the exercise correctly:
Equipment Needed
Exercise mat (for comfort)
Light dumbbells (optional for added resistance)
Instructions
Step 1: Starting Position
Lie Down: Begin by lying face down on an exercise mat. Your body should be straight, with your forehead resting on the mat.
Position Your Arms: Raise your arms straight out to the sides at a 90-degree angle, forming a “W” shape. Your elbows should be bent and positioned at shoulder height. Your palms should be facing down and off the ground.
Step 2: Engage Your Core
Tighten Your Abdomen: Activate your core muscles to maintain stability throughout the exercise. This will also prevent excessive strain on your lower back.
Step 3: Perform the W Fly
Squeeze Your Shoulder Blades: From the “W” position, focus on squeezing your shoulder blades together as you lift your hands further away from the ground. This will engage the upper back muscles.
Maintain Elbow Position: Keep your elbows bent at 90 degrees as you lift, ensuring that your arms stay in a “W” shape.
Hold the Position: Hold this contracted position for a moment, feeling the activation in your upper back.
Step 4: Transition to I Fly
Extend Your Arms: From the “W” position, slowly straighten your arms while keeping them elevated off the ground. Your body should now resemble an “I.”
Engage Your Muscles: As you reach the “I” position, focus on maintaining tension in your upper back and shoulders.
Step 5: Return to W Position
Reverse the Movement: Slowly bend your elbows to bring your arms back to the “W” position. Control the movement and avoid dropping your arms quickly.
Maintain Core Engagement: Ensure that your core is still engaged as you return to the starting position.
Step 6: Repeat
Repetitions: Perform 10-15 repetitions of the prone W Fly to I Fly exercise.
Sets: Aim for 2-3 sets, resting for about 30-60 seconds between sets.
Tips
Breathing: Inhale as you lift your arms into the “W” position and exhale as you transition to the “I” position.
Maintain Alignment: Ensure that your head, neck, and spine remain in a neutral alignment throughout the exercise.
Modification: If needed, perform the exercise without weights or use lighter weights to focus on form first.
Conclusion
Incorporating the prone W Fly to I Fly exercise into your routine will help enhance shoulder strength and stamina while promoting better posture. Regular practice can lead to improved muscle activation and overall upper back health.
In both personal and professional realms, individuals often find themselves experiencing periods of stagnation or feeling “stuck.” This state can arise from a variety of reasons, such as a lack of direction, unclear objectives, or overwhelming aspirations. In these moments, establishing SMART goals can be an effective strategy to regain focus and motivate oneself to take meaningful action. SMART, an acronym for Specific, Measurable, Achievable, Relevant, and Time-bound, provides a structured framework that enables individuals to set clear objectives and outlines a path to achieving them.
The first component of SMART goals—specificity—is crucial for understanding what one wants to achieve. A specific goal clearly articulates the desired outcome, which helps eliminate ambiguity. For example, instead of setting a broad objective like “I want to be healthier,” a specific goal would be “I want to walk 3 times a week.” By defining the goal with precision, individuals are better equipped to identify the necessary steps required to achieve it. This clarity helps to create a targeted plan and fosters motivation, reducing the feeling of being overwhelmed.
Measurable goals provide a way to evaluate progress and success. When individuals can quantify their objectives, they can monitor their advancements and make necessary adjustments along the way. For instance, “I want to walk a mile 3 times a week.” By tracking progress through measurable indicators, individuals can celebrate small victories, which serves to enhance motivation and reinforce commitment. Knowing how far you’ve come can be an essential motivator when you feel stuck.
The achievable aspect of SMART goals emphasizes the importance of setting realistic objectives that can feasibly be accomplished. It’s essential to recognize that while aiming high is admirable, setting unattainable goals can lead to feelings of failure and frustration. For example, “I plan to lose a pound a week for 3 months.” Instead, a more achievable goal might be, “I want to walk a mile 1-3 times a week.” By breaking down aspirations into manageable parts, individuals can build confidence through incremental achievements, fostering a sense of progress that can help move past feelings of being stuck.
Relevance ensures that the goals set align with your broader life ambitions, interests, and values. Goals that resonate personally are more motivating and meaningful. For example, if someone’s long-term aspiration is to live healthier, a relevant goal might be “After work, I want to walk a mile 1-3 times a week.” When goals hold relevance to one’s life, they provide greater incentive to pursue them, thereby helping to overcome stagnation as individuals can see how their efforts contribute to their long-term dreams.
The final element of SMART goals is being time-bound, which involves setting a deadline for achieving the goals. Establishing a timeframe creates urgency and encourages individuals to take action. Without a specific timeline, it’s easy to procrastinate, leading to further feelings of being stuck. For instance, a goal like “After work, I will walk a mile 1-3 times a week for 3 months”, gives a clear deadline and prioritizes tasks that need to be accomplished. This urgency can propel individuals into action, helping to clear indecision and motivate progress.
In conclusion, utilizing the SMART goals framework offers a practical approach for individuals who feel stuck in various aspects of their lives. Through specificity, measurability, achievability, relevance, and time-bound elements, SMART goals foster clarity and a structured pathway toward achieving objectives. The framework not only helps individuals regain focus and motivation but also instills a sense of accountability and purpose. By breaking down the overwhelming into manageable and meaningful actions, SMART goals can transform periods of stagnation into opportunities for growth, ultimately leading to personal and professional fulfillment. Embracing this approach can empower individuals to navigate challenges, overcome obstacles, and achieve their ambitions.
The human body is an intricate system that relies on various muscle groups for support, movement, and overall health. Among these muscle groups, the gluteus muscles, commonly referred to as the glutes, play a critical role in maintaining stability, facilitating movement, and supporting the spine. Given their substantial influence on mobility and posture, strengthening the glutes should be a priority for individuals aiming to enhance their physical well-being.
An unknown function of the glute muscles, which consist of the gluteus maximus, medius, and minimus, is to provide support for the spine. The gluteus maximus, the largest of the three, is crucial for hip extension, which occurs during activities such as walking, running, and climbing stairs. When the glutes are strong, they help maintain proper alignment of the pelvis and spine. This alignment is vital for reducing the risk of injuries and preventing pain, especially in the lower back.
Inadequate strength in the glutes can lead to compensatory patterns in movement. This often results in increased pressure on the lumbar spine and the potential development of musculoskeletal problems. By engaging the glutes effectively, individuals can relieve tension in the lower back muscles, allowing for better spinal health and overall body function.
Strong glute muscles are critical for maintaining stability and balance during movement. The gluteus medius, in particular, plays a significant role in stabilizing the pelvis during activities such as walking and running. Effective stabilization helps distribute forces evenly throughout the body, which is essential for preventing falls and ensuring efficient movement mechanics.
Additionally, strong glutes contribute to proper gait mechanics. When the glutes are activated, they help control the movement of the legs, ensuring that the knees track properly during various activities. This control not only enhances performance in sports and exercise but also reduces the risk of injuries related to poor biomechanics.
The glutes are integral to the body’s kinetic chain, meaning they are involved in multiple movement patterns. Activities such as standing up from a seated position, jumping, and climbing all require the activation and strength of the glute muscles. When the glutes are strong, they provide the necessary power and force for these movements, enabling individuals to perform daily tasks with greater ease and efficiency.
Moreover, strong glutes contribute to athletic performance. In sports that require sprinting, jumping, or quick lateral movements, the glutes are key players. Developing these muscles can lead to improved explosiveness and agility, giving athletes a competitive edge.
In summary, the importance of strong glutes cannot be overstated. They provide support for the spine, improve stability and balance, and facilitate movement in daily life and athletic pursuits. By prioritizing glute strength through targeted exercises, individuals can enhance their overall functional capacity, reduce the risk of injuries, and promote long-term spinal health. In an era where sedentary lifestyles are prevalent, recognizing the value of strong glutes becomes even more critical for maintaining optimal health and mobility.
Prone Y, T, and A Fly exercises are excellent for activating the upper back, shoulders, and improving posture before you exercise. They are often used in rehabilitation programs and for enhancing athletic performance. Here’s how to perform each of these exercises step by step.
Prone Y Fly
Equipment Needed:
A flat, resistant surface (like a mat)
Light dumbbells (optional) 1-3lbs
Steps:
Starting Position:
Lie face down on the mat, extending your arms overhead in a “Y” shape with your thumbs facing up.
Engage Your Core:
Tighten your abdominal muscles to stabilize your torso.
Lift Your Arms:
While keeping your head neutral (looking at the mat), lift your arms off the ground.
Focus on lifting from your shoulder blades rather than your arms or back.
Squeeze the Shoulder Blades:
Hold the position for a second at the top, squeezing your shoulder blades together.
Lower:
Slowly lower your arms back to the starting position.
Upper Trapezius Photo by Ketut Subiyanto on Pexels.com
Prone T Fly
Equipment Needed:
A flat, resistant surface (like a mat)
Light dumbbells (optional) 1-3lbs
Steps:
Starting Position:
Lie face down on the mat, extending your arms out to the side in a “T” shape, with your thumbs facing up.
Engage Your Core:
Tighten your abdominal muscles to stabilize your torso as you did in the Y Fly.
Lift Your Arms:
Raise your arms off the ground while keeping them straight and parallel to the floor.
Squeeze the Shoulder Blades:
Hold the position for a moment, and focus on squeezing your shoulder blades together at the top.
Lower:
Slowly bring your arms back down to the mat.
Repetitions:
Aim for 10-15 repetitions.
Middle Trapezius Photo by GATO PRETO on Pexels.com
Prone A Fly
Equipment Needed:
A flat, resistant surface (like a mat)
Light dumbbells (optional) 1-3lbs
Steps:
Starting Position:
Lie face down on the mat, positioning your arms at a 45-degree angle to your body, resembling an “A” shape.
Palms should face downward.
Engage Your Core:
As with the previous exercises, tighten your abdominal muscles for stability.
Lift Your Arms:
Raise your arms off the ground while maintaining the “A” shape.
Squeeze the Shoulder Blades:
Hold for a second at the top while focusing on squeezing the shoulder blades.
Lower:
Gradually lower your arms back to the starting position.
Repetitions:
Complete 10-15 repetitions.
Lower Trapezius Photo by Nathan Bernardoni on Pexels.com
Tips for All Exercises:
Breath Control: Inhale as you lower the arms, and exhale as you lift.
Form is Key: Maintain good posture throughout the exercises and avoid overarching the back.
Progress Gradually: Start with no weights and add light dumbbells as you become more comfortable with the movements.
Incorporating these exercises as an activation routine can help improve your upper body strength and overall posture. Always consult with a professional if you’re unsure about the proper form or if you have any health concerns.
The Body Mass Index (BMI) has long been a standard tool for assessing body weight relative to height, providing a quick and straightforward method to categorize individuals as underweight, normal weight, overweight, or obese. However, while BMI offers certain advantages, it also has significant limitations that necessitate a more nuanced understanding of body weight and health.
Simplicity and Accessibility: BMI is uncomplicated to calculate, requiring only height and weight measurements. This simplicity makes it an easily utilized tool for both healthcare providers and individuals.
Population-Level Insights: BMI serves as an effective measure for assessing the weight status of large populations, providing data that can inform public health initiatives and research concerning trends in obesity and underweight conditions.
Cost-Effectiveness: Since BMI calculation does not require expensive equipment or testing, it can be implemented in various settings, from clinical environments to community health programs, making it a resource-efficient screening method.
Preliminary Risk Assessment: Higher BMI categories are associated with increased risks for several health conditions, including heart disease, diabetes, and certain cancers. BMI can be used as an initial screening tool to identify individuals who may need further assessment.
Lack of Body Composition Differentiation: One major limitation of BMI is that it does not distinguish between muscle mass and fat mass. An individual with a high muscle mass may be classified as overweight or obese, despite being healthy.
Neglect of Fat Distribution: BMI fails to account for how fat is distributed in the body. For example, individuals with visceral fat (fat stored around the organs) have higher health risks even if their BMI falls within a normal range.
Inapplicability to Specific Groups: BMI may not adequately represent body composition in certain populations, such as professional athletes, older adults, or various ethnic groups, potentially leading to misleading assessments about their health.
Psychological Implications: A focus on BMI can contribute to negative body image issues and unhealthy behaviors among individuals who may obsess over their weight, rather than focusing on overall health.
Increased public education about nutrition, caloric intake, and the importance of physical activity can equip individuals with the knowledge to make healthier lifestyle choices and combat obesity.
2. Access to Healthy Foods
Ensuring that communities have access to affordable and nutritious food options, such as fruits, vegetables, and whole grains, is essential for fostering healthy eating habits and reducing obesity rates.
3. Promotion of Physical Activity
Incorporating regular physical activity into daily life through community programs, workplace wellness initiatives, and recreational opportunities can help individuals maintain a healthy weight and improve overall health.
4. Support and Community Programs
Supportive environments, including counseling, peer support groups, and community-based weight management programs, can provide motivation and encouragement for individuals seeking to lose weight or maintain healthy habits.
5. Policy Interventions
Government policies that regulate food marketing, improve nutrition labeling, and promote public health programs can help create an environment conducive to healthy living and obesity prevention.
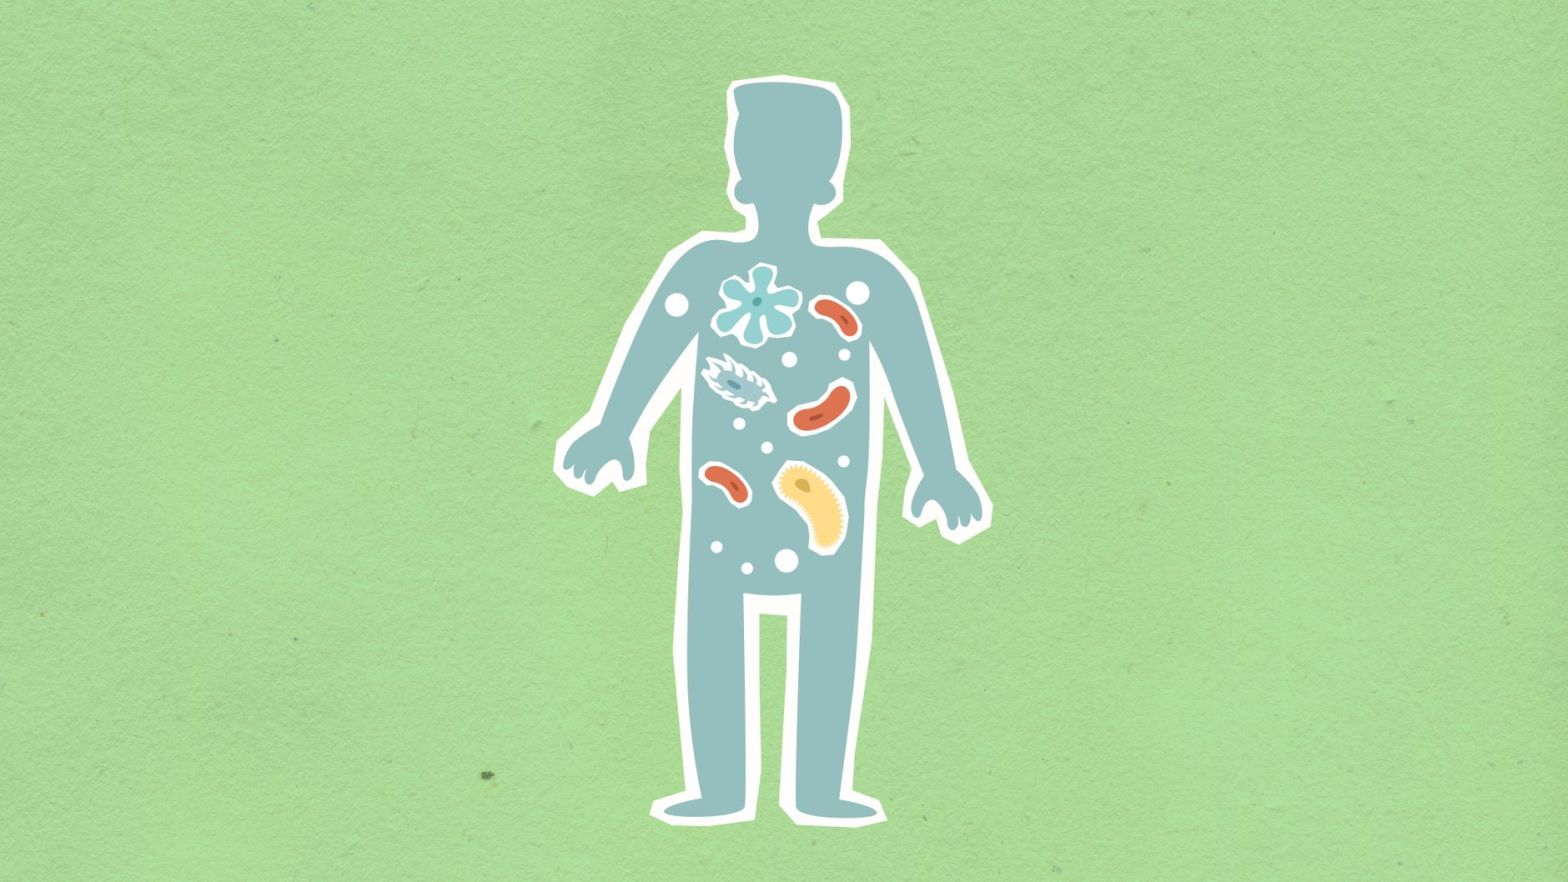
Recent research has highlighted the importance of the gut microbiome in regulating weight and influencing metabolic health. A diverse and balanced gut microbiome can play a crucial role in combating obesity.
1. Enhanced Digestion and Nutrient Absorption
A healthy gut microbiome supports efficient digestion and nutrient absorption, which is vital for maintaining a healthy weight. When the gut microbiome is imbalanced, it may lead to issues such as metabolic syndrome and obesity.
Certain gut bacteria can influence metabolic processes, impacting how the body extracts energy from food and stores fat. An imbalance in the gut microbiome may contribute to weight gain and obesity.
A balanced gut microbiome helps reduce inflammation in the body, which is often associated with obesity. By promoting an anti-inflammatory environment, a healthy microbiome can support weight loss efforts.
Incorporating probiotics (found in fermented foods like yogurt and acidophilus capsules) and prebiotics (found in fruits, vegetables, and whole grains) can improve gut health and support a healthy weight. These foods promote diversity in the gut microbiome, aiding in weight management.
Emerging research shows that gut health is connected to mental well-being through the gut-brain axis. A balanced microbiome can positively influence mood and behaviors related to food, enhancing motivation for a healthy lifestyle.
While the Body Mass Index provides a simple and accessible means for assessing body weight, its limitations necessitate a broader perspective on health. Addressing obesity requires a multi-dimensional approach that includes education, accessible healthy foods, physical activity, community support, and policy changes. Furthermore, fostering a healthy gut microbiome emerges as a promising strategy in the fight against obesity, emphasizing the interconnectedness of diet, health, and well-being. By integrating these multifaceted approaches, we can work towards reducing obesity rates and promoting healthier lifestyles for all.
Pelvic asymmetry in the frontal plane refers to an imbalance or misalignment of the pelvis that can lead to various functional and structural issues in the body. This condition is significant as it can affect posture, biomechanics, and overall movement patterns.
Several factors can contribute to pelvic asymmetry in the frontal plane, including:
Muscle Imbalances: Imbalances between the hip abductors and adductors can lead to an uneven pelvis, resulting in compensatory movements and postural deviations.
Structural Anomalies: Anatomical differences in the pelvis, such as leg length discrepancies, can cause asymmetry.
Injuries: Previous injuries to the pelvis, hips, or lower back may result in compensatory patterns that favor one side of the body over the other.
Poor Posture: Prolonged periods of sitting, standing, or other activities performed with poor posture can also lead to pelvic misalignment.
Repetitive Movements: Athletic activities or occupational tasks that involve repetitive motions may exacerbate or lead to the development of asymmetries.
Myofascial release can be an effective approach to help alleviate symptoms associated with pelvic asymmetry. Here are some techniques to consider:
Self-Myofascial Release (SMR): Use tools like foam rollers or balls to target tight muscles in the hips, glutes, and lower back. Focus on tender areas for about 30-60 seconds to release tension.
Trigger Point Release: Identify trigger points in the gluteal muscles or hip flexors and apply sustained pressure until the muscle releases. This can help restore normal length and function.
Hip Stretching: Incorporate stretches that focus on the hip abductors and adductors to promote balance. For example, side-lying leg stretches and frog stretches can be beneficial.
Pelvic Tilts: Engage in pelvic tilting exercises to improve awareness and muscle control, which can help in restoring symmetry.
Professional Intervention: Seeking help from a qualified therapist trained in myofascial release can provide tailored techniques that address individual needs.
Understanding pelvic asymmetry in the frontal plane is crucial for maintaining proper biomechanics and overall health. By recognizing its causes and symptoms, and implementing appropriate myofascial release techniques, individuals can work towards correcting imbalances and improving their quality of movement/life. Movement is an expression of life. Movement is life!